This tutorial is only applicable to Legacy CMS Portal stores.
Product Comparison is a native VTEX feature that allows you to view the details and specifications of selected products side by side. This makes it easy to compare items and quickly identify differences between their specifications.
The configuration process involves two steps:
- Comparison page: Where you can view a side-by-side comparison of products selected from the product listing page.
- Product listing page: Where you can select products to compare.
Product comparison doesn't work on the store homepage.
Instructions
Follow the steps below to configure the product comparison in your store.
Comparison page
- Create a shelf template to standardize product display on the comparison page. In this template, you can use any of the available controls for shelves.
- Create a page template using the
<vtex.cmc:ProductComparison/>control, which displays products side by side on the comparison page. Example usage of the control:
<vtex.cmc:ProductComparison ShelfLayoutId="12343216-4c8e-4cd5-bcd7-e3b062681f2a"/>
where ShelfLayoutId is the Id of the shelf template created in the previous step.
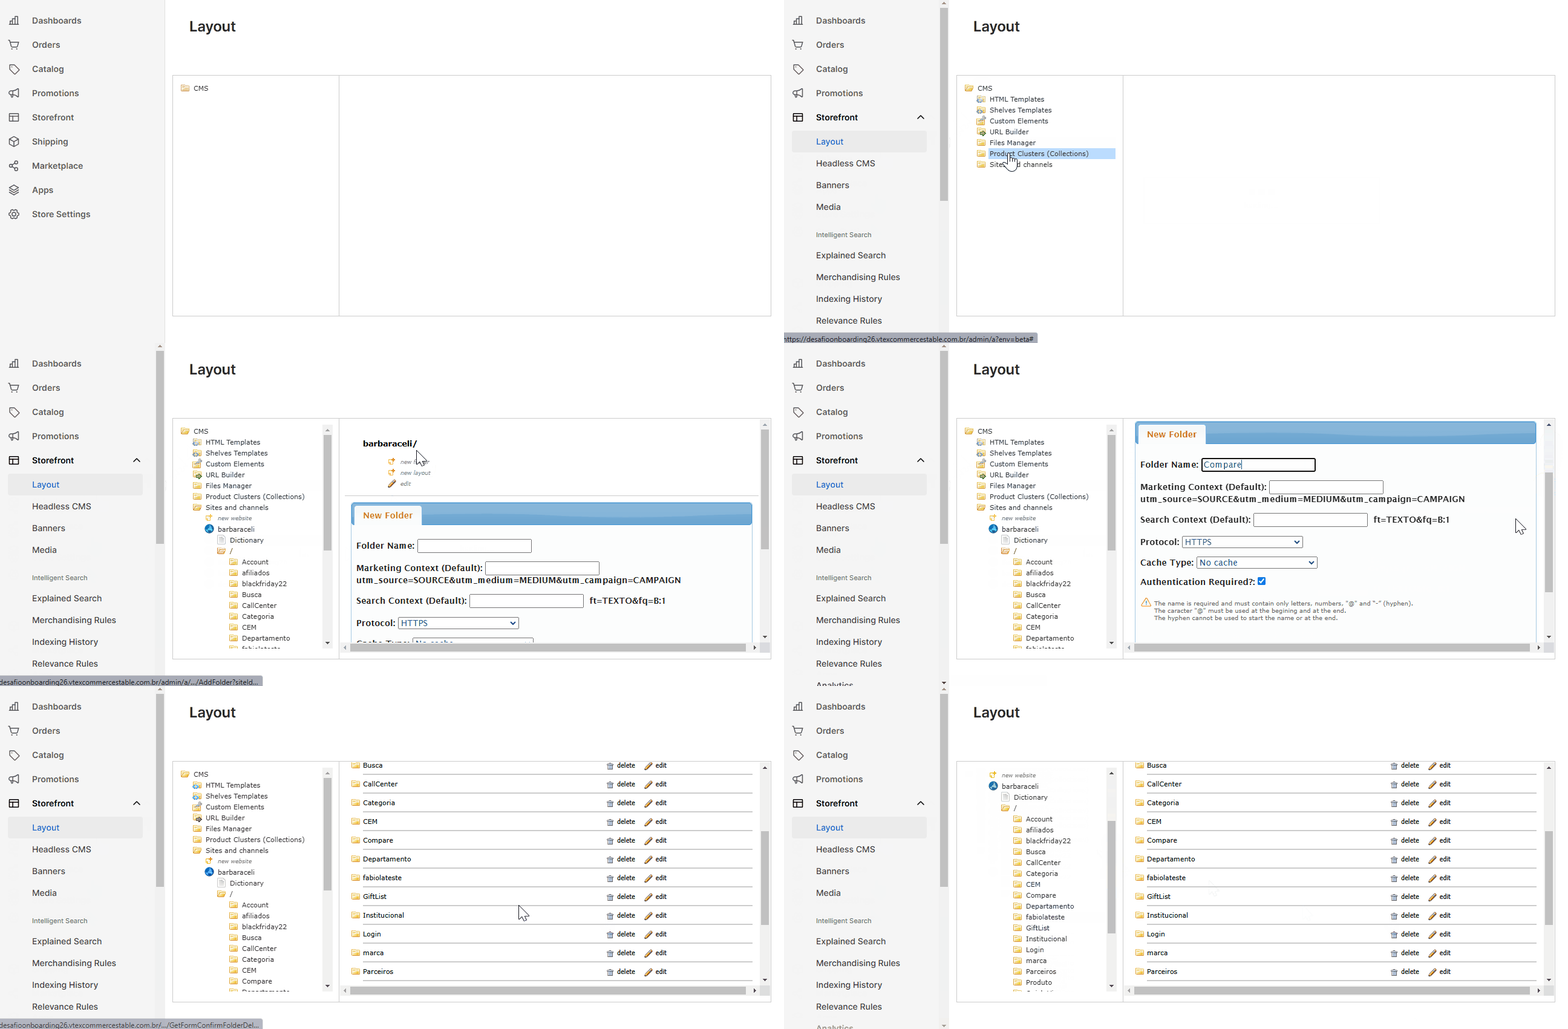
- Create a folder for the comparison page:
-
In the Admin, go to Storefront > Layout
-
In the column next to it, click
CMS > Sites and channels > {website name} > / > New folder. Replace{website name}based on your scenario. -
In the
Folder Namefield, enter a name for the folder and clickOK. -
Click
Save Folder.
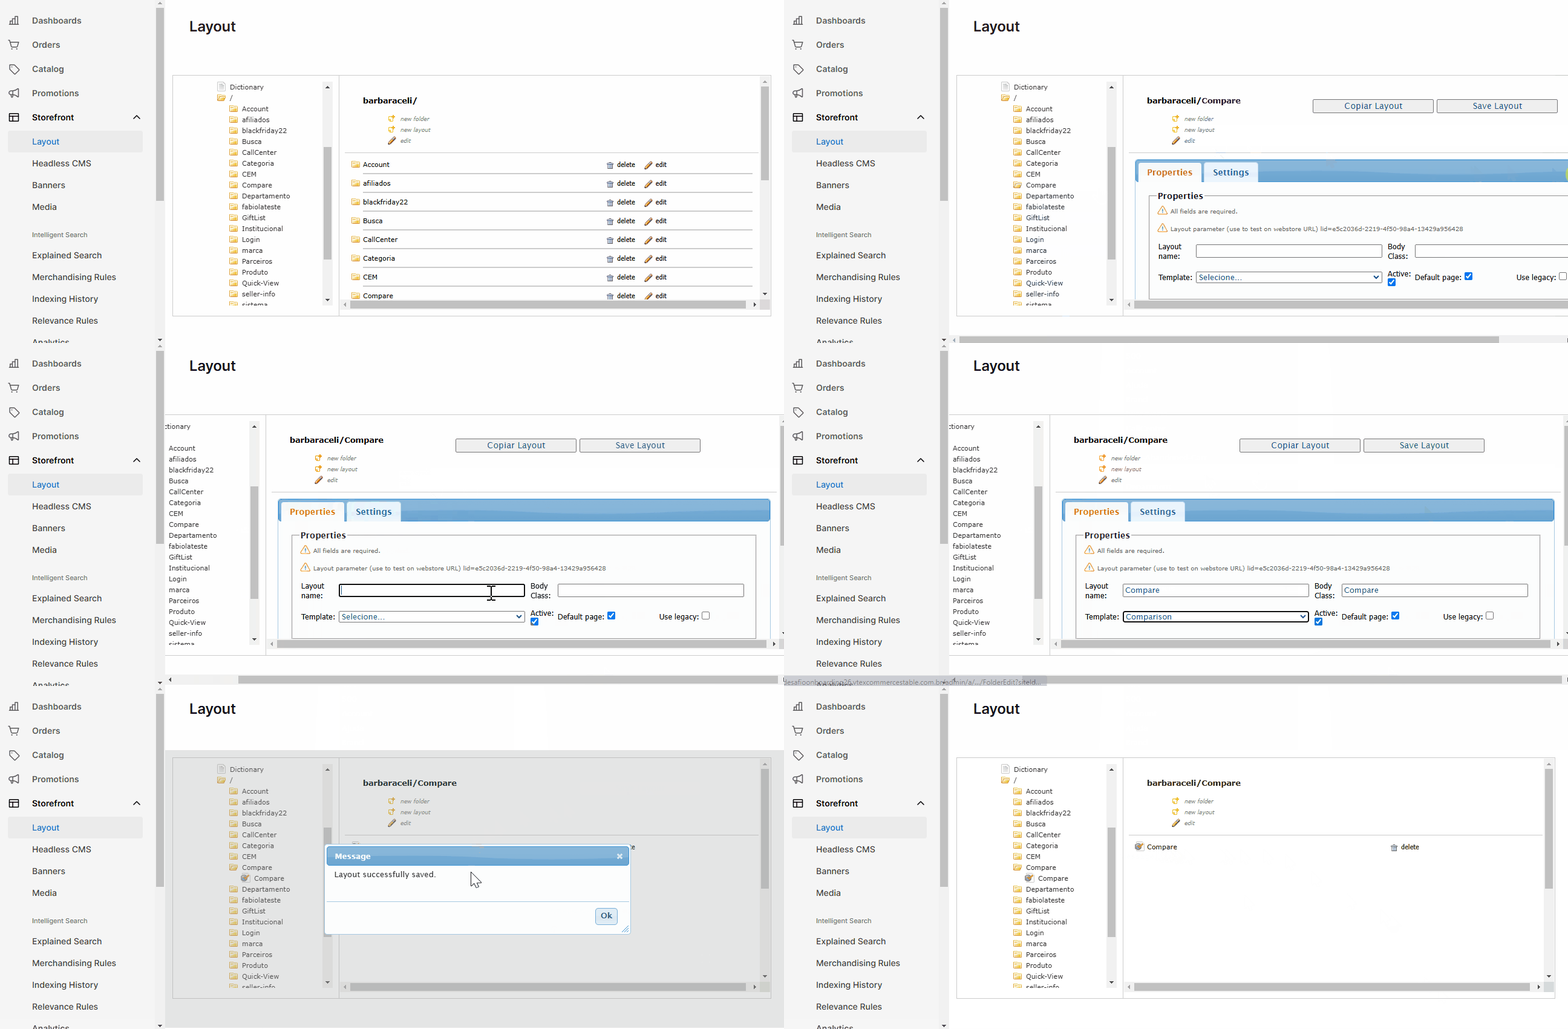
- Create a default layout:
-
Open the folder created in the previous step.
-
Click New layout.
-
In the
Templatefield, link the page template created in step 2 to the folder. Learn more in Associating a template with a layout. -
Click
Save Layoutand then clickOK.
Product listing page
To display products with the comparison option (checkbox), add the $product.Compare control to the shelf templates where you want to include this feature. This control will render a checkbox to select products for comparison. Additionally, the control will provide a Compare link in the header and footer of the product listing. You can click this link to be redirected to the comparison page.
You can only compare 4 products at a time.