Redirects are a tool to forward both users and search engines to a more relevant or similar live URL different from those they initially requested.
Multi-domain stores commonly ask for redirect management per binding due to the complexity presented by the several URLs available simultaneously.
Taking this into consideration, VTEX enables you to manage your URL redirects according to the store bindings through the admin interface.
To create, edit, or remove redirects, the Admin user must have a role that has the License Manager CMS Settings resource. You can grant the user a role with the resource by following the instructions in the How to manage users article or create a new role including the resource by following the instructions in the Roles article.
In VTEX Admin:
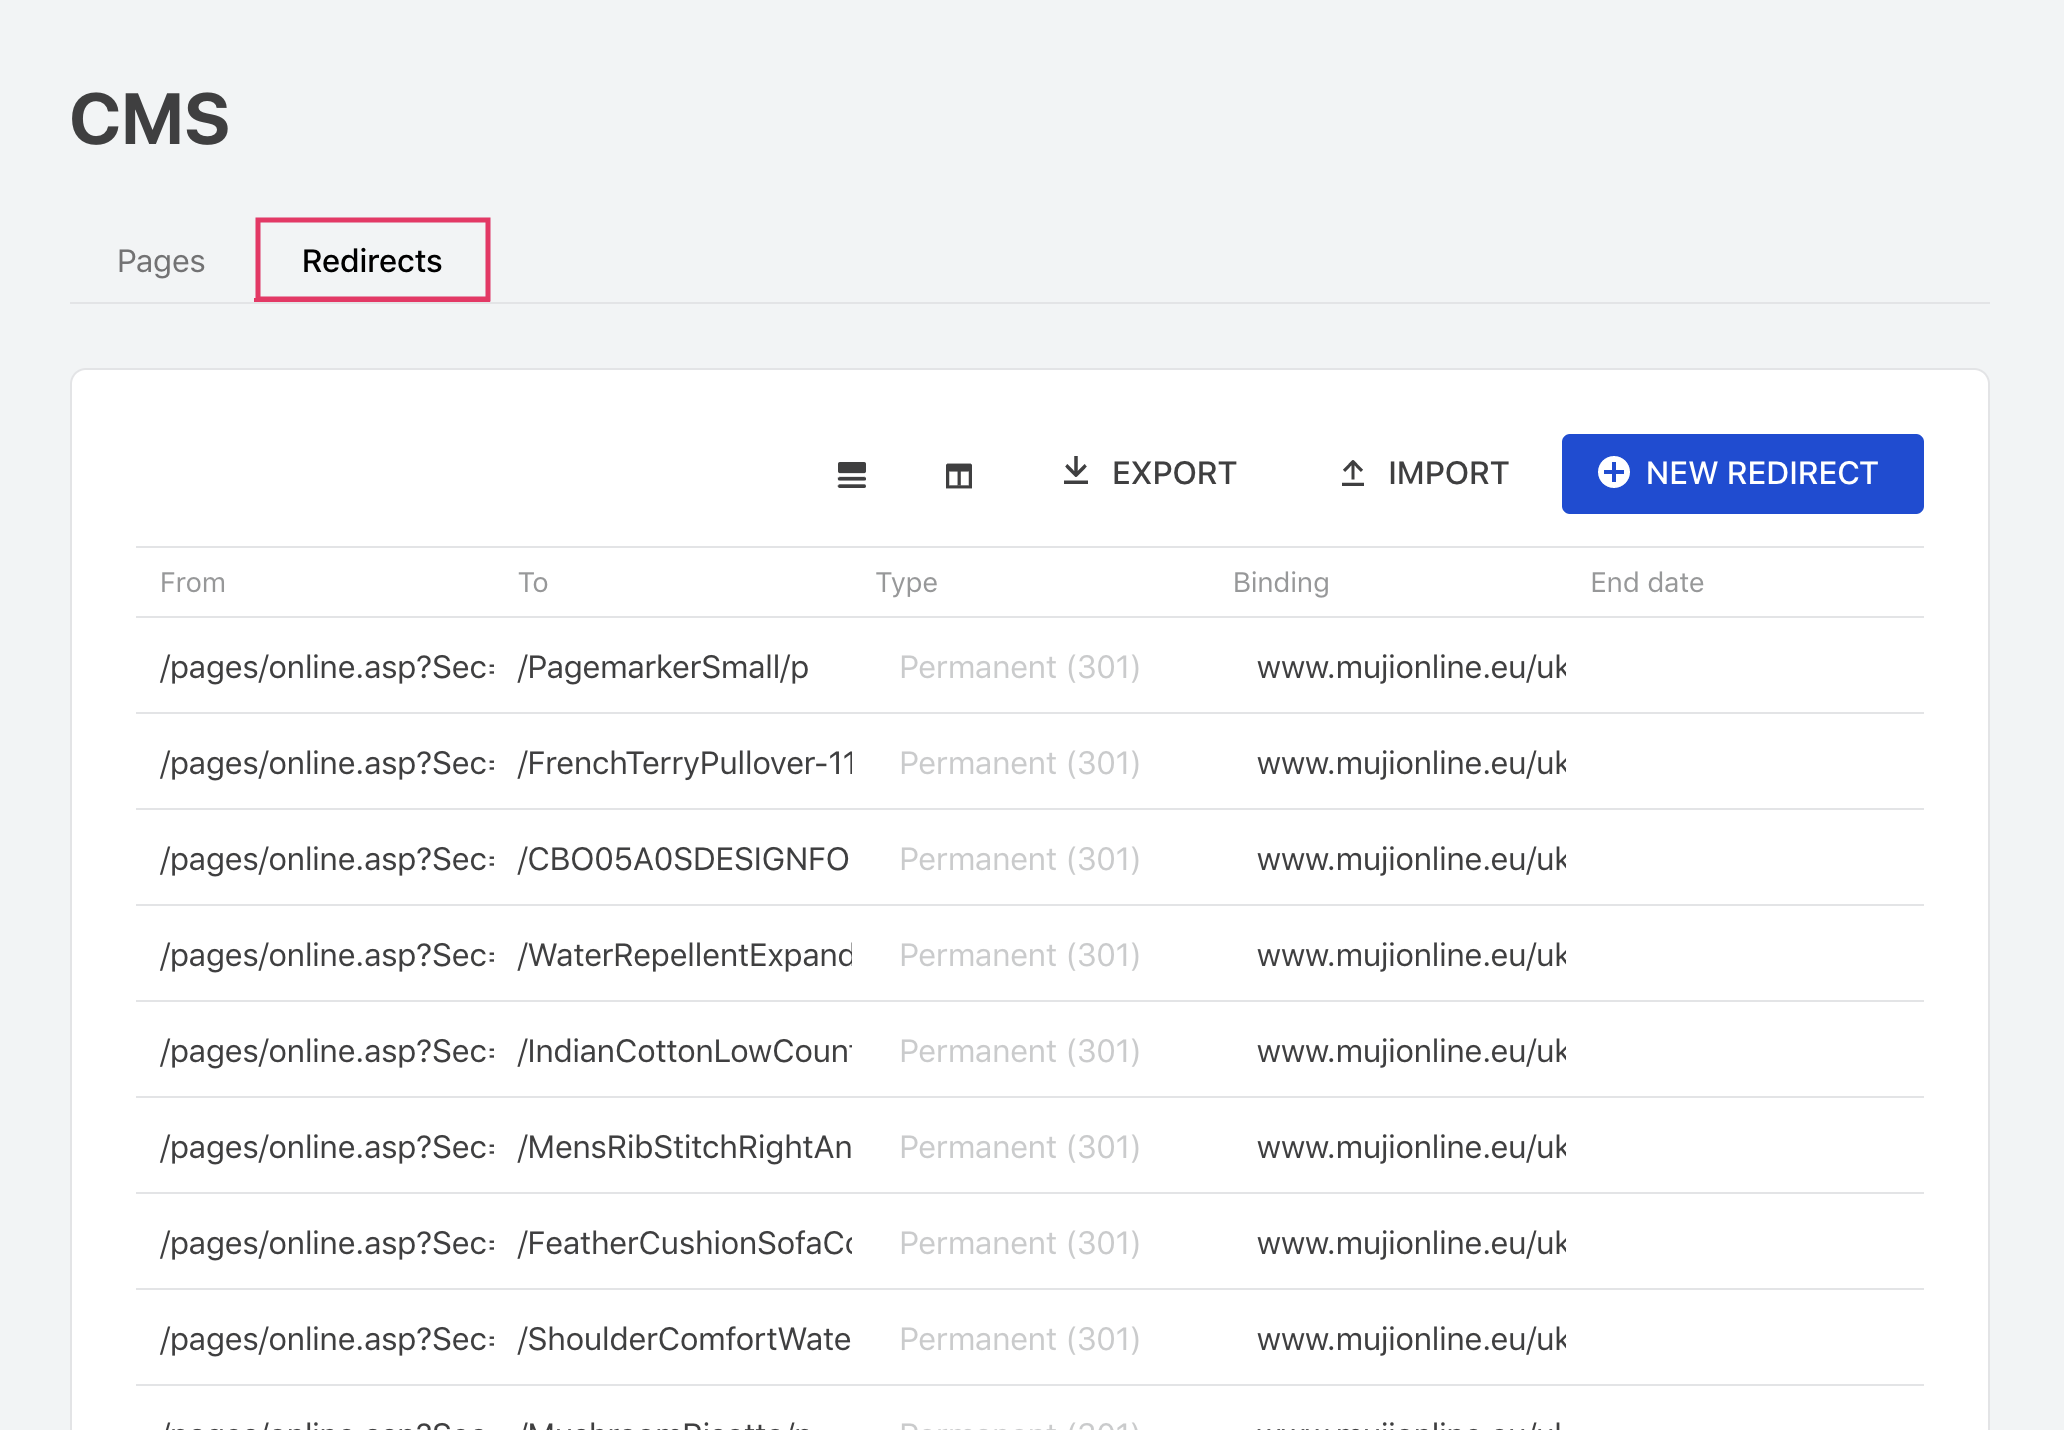
- Access Storefront > Pages.
- Click on the
Redirectstab.
Manually creating redirects
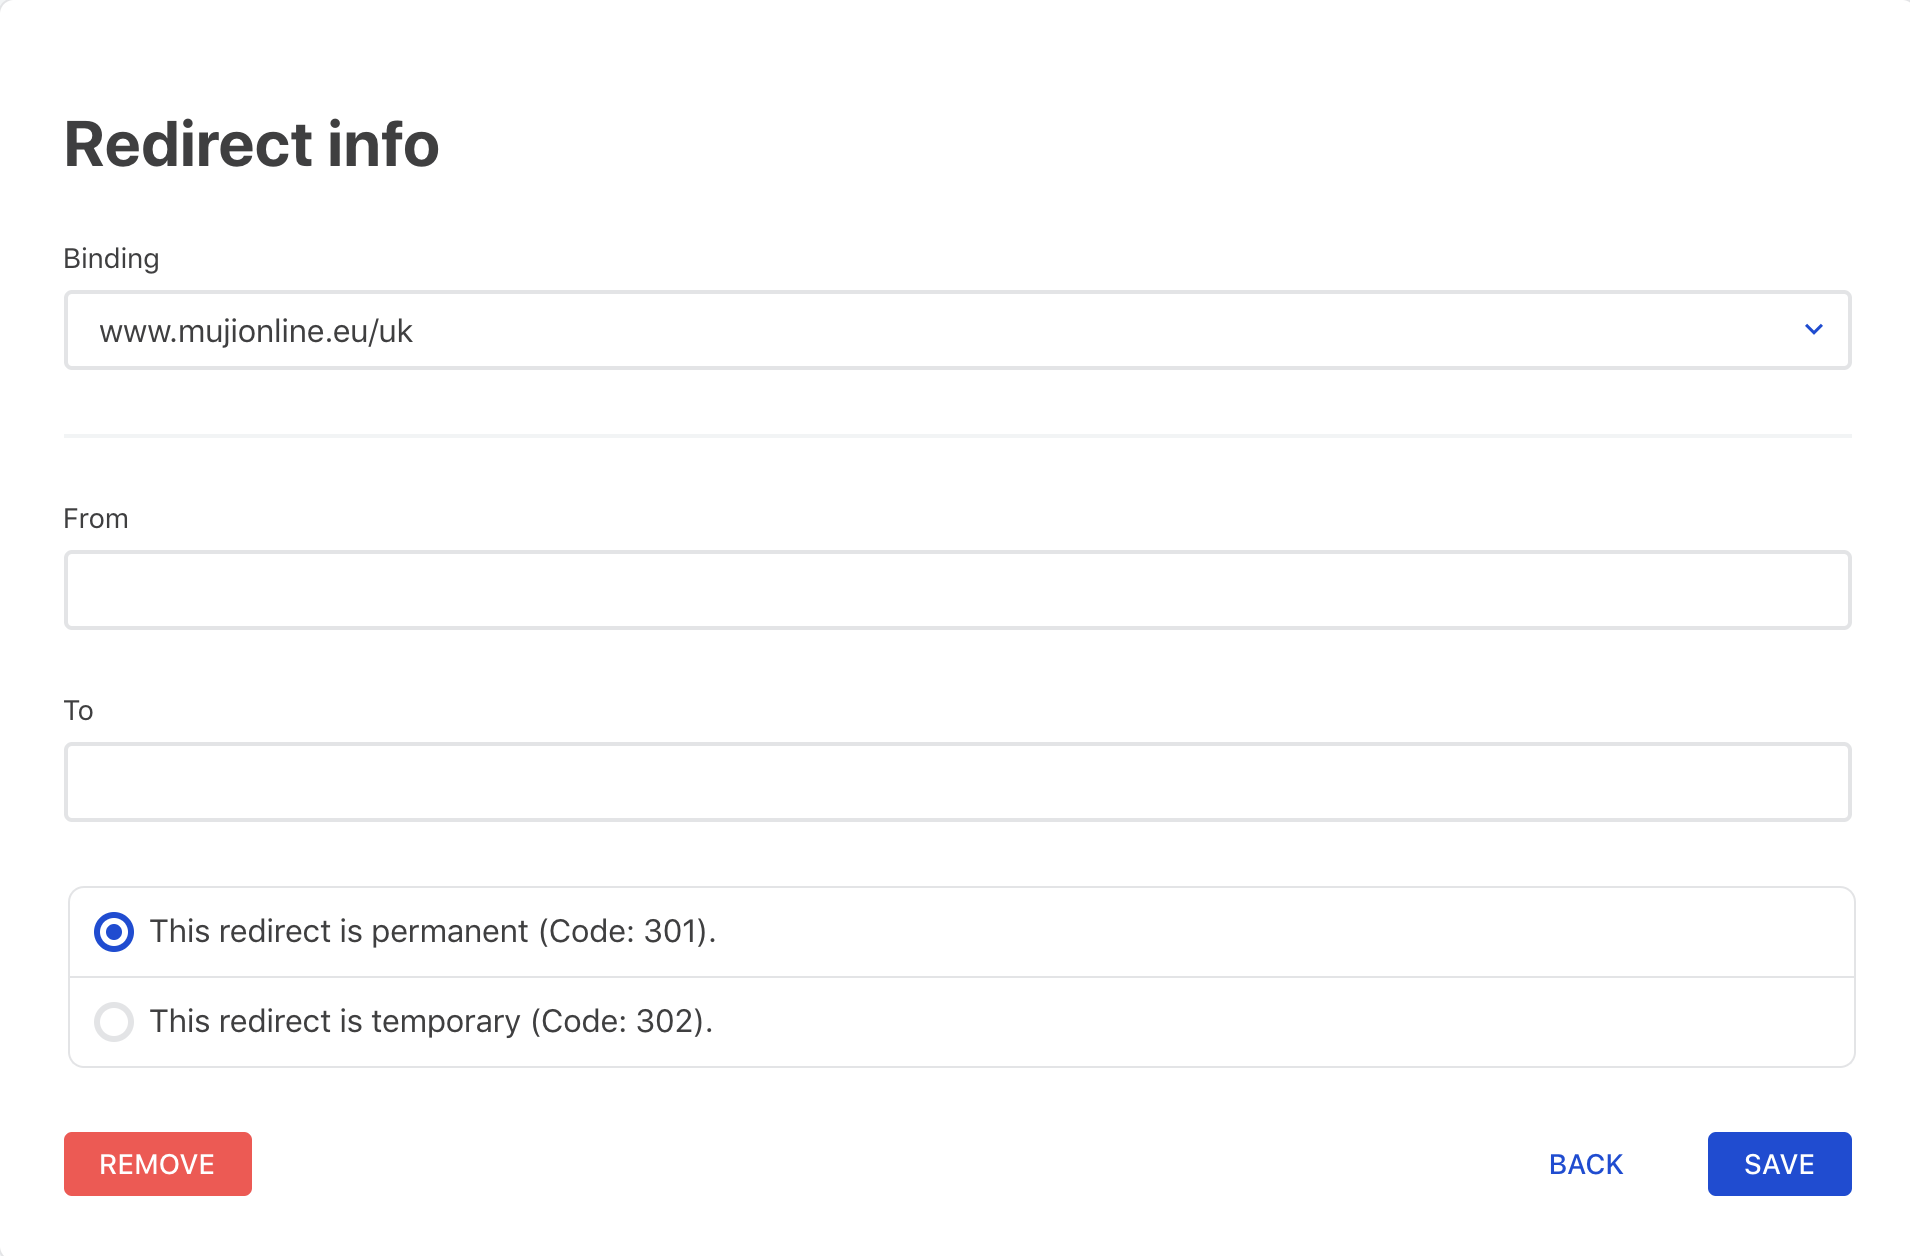
- Click on the
New Redirectbutton. - In the
Bindingfield, use the dropdown menu to select the desired binding. - Use the
FromandTofields to define the former URL and the new one to which users and search engines will be redirected. - Check whether your redirect will be permanent or temporary — in case it is temporary, you can toggle the
This redirect has an end datebutton to set an end date for it. - Save your changes.
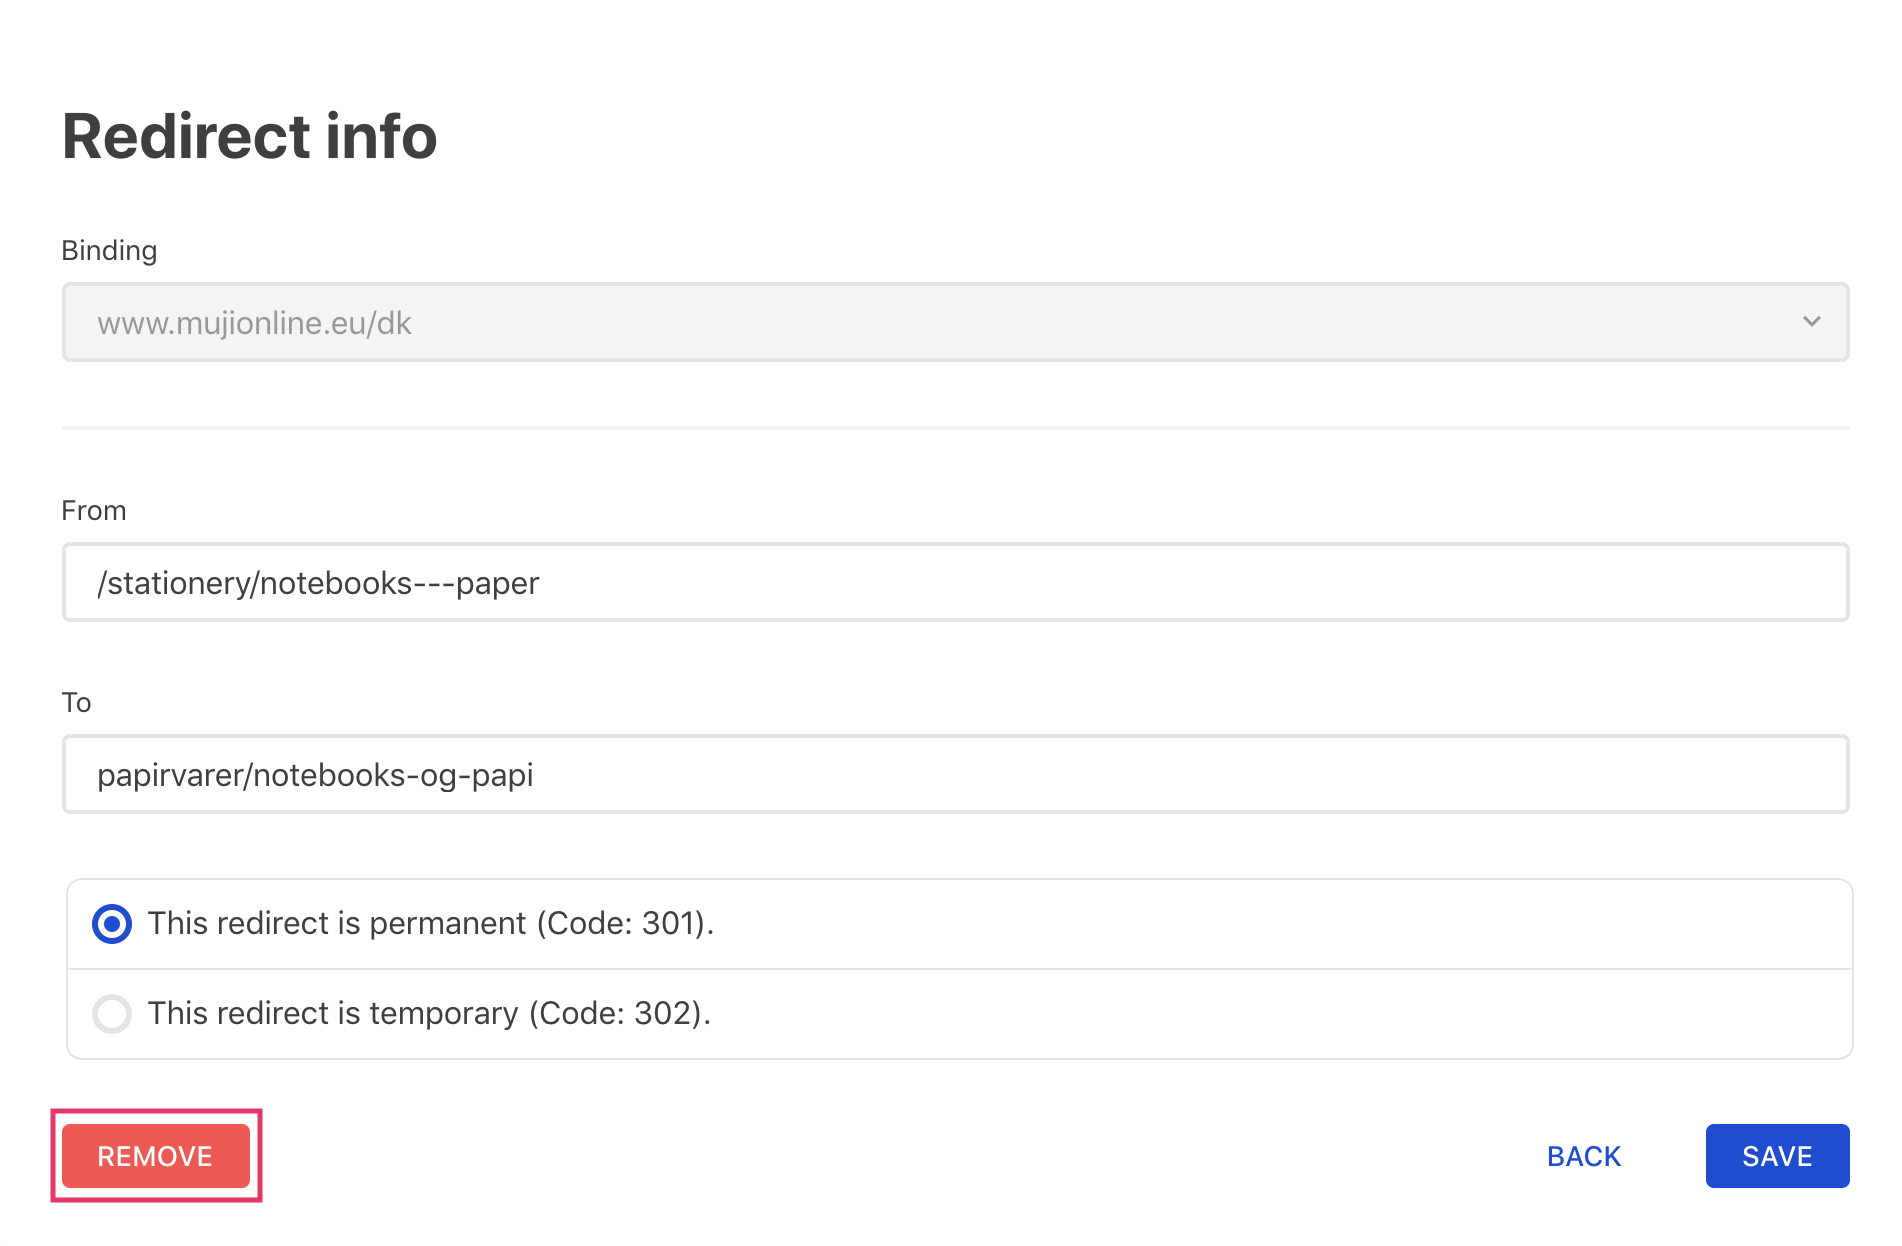
Manually deleting redirects
- Click on the desired redirect to be deleted.
- Click on the
Removebutton. - Confirm your action.
A bug may be found when trying to click on redirects with query strings. The VTEX product team is already aware of this unexpected behavior and working on the fix. If you cannot click on the desired redirect to delete it, opt to do it through the spreadsheet while the issue is not resolved.
Importing and exporting redirects
To manage your store's redirects in bulk, you can import and export a redirect spreadsheet.
The spreadsheet's inputs will be mandatorily created or deleted from the store's redirect list — it is not possible to create and delete redirects using the same spreadsheet. Before filling out and uploading yours to the admin, keep in mind your final goal with it.
- Click on the
Importbutton and then onDownload Template. Click on theExportbutton if you aim to download and modify the pre-saved redirect list. - Open the spreadsheet template once the download is done and fill out the cells in the suitable columns according to the table below:
| Column | Expected value |
|---|---|
from | Former URL no longer useful to users and search engines. |
to | New URL to which users and search engines will be redirected to. |
type | Whether the redirect will be permanent or temporary, i.e., have an end date. |
binding | Binding to which the redirect will be applied. Caution: this column's cells must be filled out with the desired binding IDs. |
endDate | End date for the redirect following the UTC format. Notice that this column's cells should only be filled out when the redirect type is set as temporary. |
- Save your spreadsheet once satisfied with the changes performed.
- Click on the
Importbutton. - Check the
Saveor theDeletebutton according to your scenario.
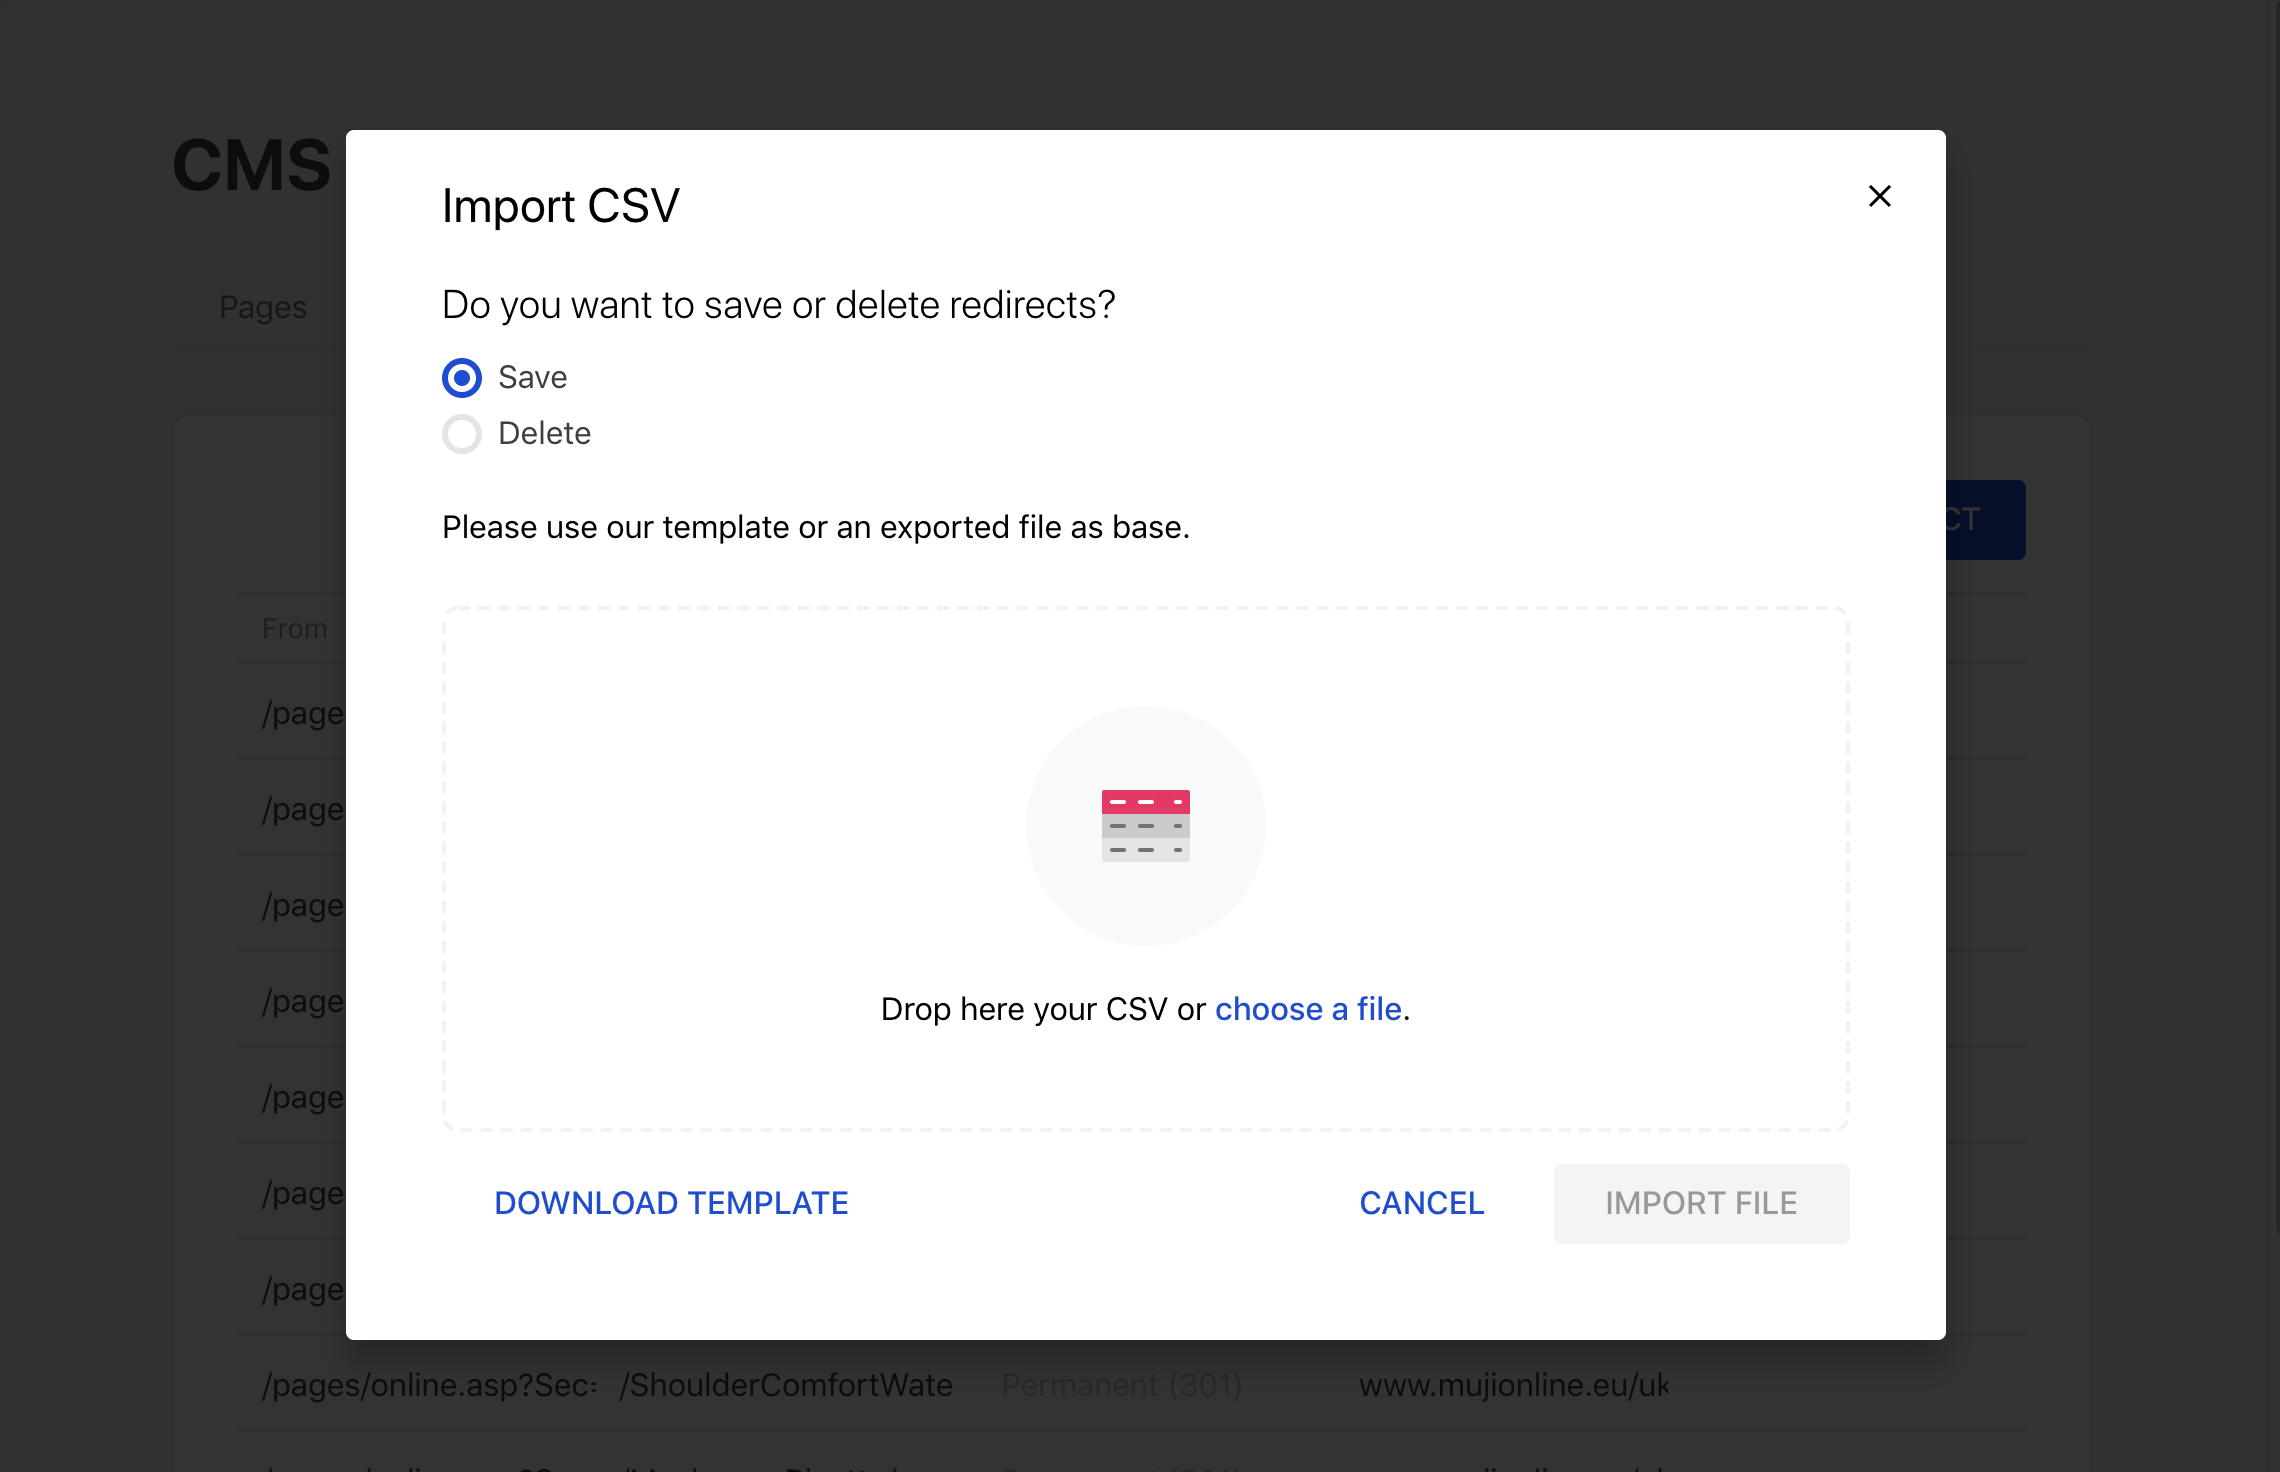
By clicking on the
Savebutton, you will create all the redirects listed in your spreadsheet, whereas clicking on theDeletebutton will remove all of them from your store's redirect database.
- Upload the spreadsheet from your local files.
- Click on the
Import filebutton.