Projects is a feature in the VTEX Headless CMS that simplifies the management of multiple frontend projects, such as mobile apps, websites, and email marketing, from one control panel.
Each project is customized with its own settings, content, and branding according to specific audiences or purposes.
In this guide, you will learn how to manage each frontend project of your store.
Before you begin
For the Headless CMS management, make sure the resources See CMS menu on the top-bar, Settings*, and CMS GraphQL API are associated with your user role. Otherwise, create a custom user role and add these resources to it or add these resources to an existing user role.
Overview
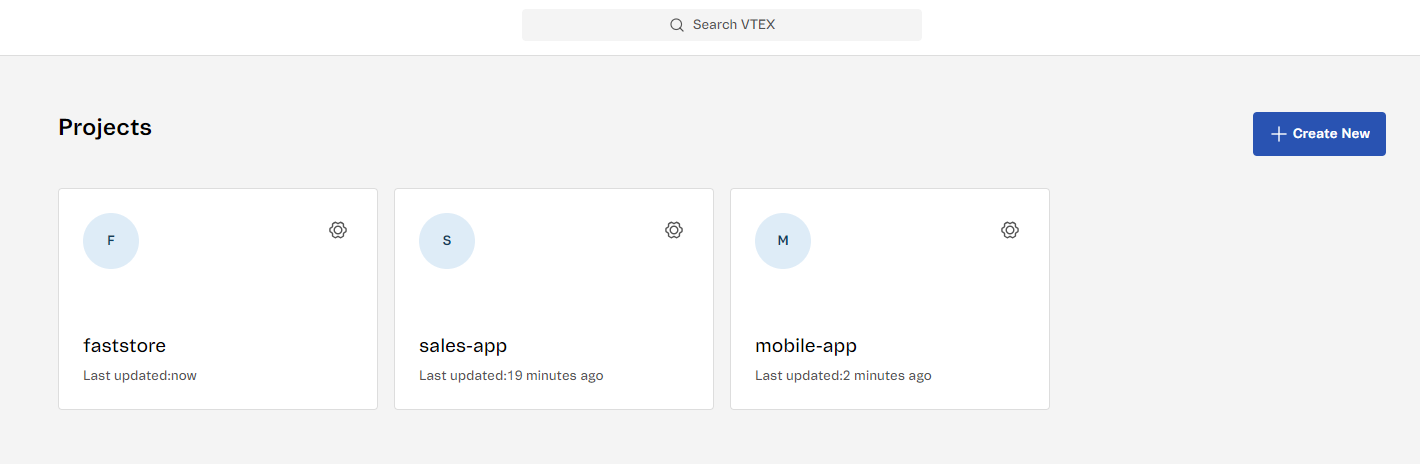
To access Projects, go to the VTEX Admin and access Storefront > Headless CMS.
| Option | Description |
|---|---|
| Project card | Opens the selected project, allowing you to create and edit pages for the project content. |
| Settings (⚙️) | Opens a modal that displays project configurations organized into three tabs: General: Edits the project ID and API settings or archives the project. Content-Types: Connects the Headless CMS project with your code source through webhooks by setting up the content types and sections. Build: Initiates and manages website builds. Set a webhook URL for build notifications and an endpoint to preview the page versions. |
| Create new | Opens a page to configure a new project from scratch. |
Creating a new project
Create a new project for your store by setting general settings such as Project ID. To effectively connect a Headless CMS project with your project's source code, you will also need to set up webhooks and build settings such as Build Webhook URL and Preview URL.
A webhook is an HTTP endpoint that enables automated communication between the VTEX Headless CMS and the project's source code. For example, it allows the CMS to notify a FastStore project of content changes or other events, triggering actions like real-time content synchronization.
- In the Projects page, click
Create new. - In the New project page, fill in the fields according to the Project settings section.
- After setting each field of the page, click
Createand a successful message will appear on the screen.
Once you have created a new project, you can create pages for it with all the URL routes and corresponding page templates of your store’s website, such as home, product, and login pages.
To create a new page, follow the steps in Managing Pages in the Headless CMS
Project settings
The Project settings allow you to configure your project according to three main categories:
- General: Edits the project ID, API settings and archives the project.
- Content-Types: Connects the Headless CMS project with your code source through webhooks by setting up the content types and sections.
- Build: Initiates and manages website builds. Set a webhook URL for build notifications and an endpoint to preview the page versions.
General
| Field name | Description | Value example |
|---|---|---|
| Project ID (mandatory) | ID of the project. | E.g., faststore |
| Storefront | Defines the VTEX storefronts available (FastStore or Custom) and their purpose. | See the Storefront section for more information. |
Storefront
This field determines the build configuration settings based on your chosen storefront. Options include:
- VTEX Storefronts:
Choose a storefront from your account (e.g., FastStore). Build automatically adjusts based on the storefront chosen. You can still customize them later.
- Custom
Choosing a
Customstorefront gives you the flexibility to define your own build settings.
Content-Types
| Field name | Description | Value example |
|---|---|---|
| Sections URL | Webhook URL for receiving and saving the sections created in the source code in the Headless CMS. | E.g., https://infra.io.vtex.com/vbase/v0/{accountName}/master/buckets/vtex.admin-cms-graphql-rc/store/files/{projectId}/sections |
| Content types URL | Webhook URL for receiving and saving the content types created in the source code in the Headless CMS. | https://infra.io.vtex.com/vbase/v0/{accountName}/master/buckets/vtex.admin-cms-graphql-rc/store/files/{builderId}/content-types |
Build
| Field name | Description | Value example |
|---|---|---|
| Sections URL | Webhook URL for receiving and saving the sections created in the source code in the Headless CMS. | https://infra.io.vtex.com/vbase/v0/{accountName}/master/buckets/vtex.admin-cms-graphql-rc/store/files/{builderId}/sections |
| Content types URL | Webhook URL for receiving and saving the content types created in the source code in the Headless CMS. | https://infra.io.vtex.com/vbase/v0/{accountName}/master/buckets/vtex.admin-cms-graphql-rc/store/files/{builderId}/content-types |
| Build Webhook URL | Webhook URL for starting a new build in the Headless CMS when a page or content is added or edited.Known Issue – Headless CMS Data Mocking Between Workspaces: Due to a data-mocking issue, drafts created in any workspace currently appear in the master environment. This means changes that should be isolated to individual workspaces are visible in the master workspace. | https://app.io.vtex.com/vtex.cms-builder-sf-jamstack/v1/{accountName}/master/build-releases |
| Save Webhook* URL | Webhook URL for enabling real-time previews of the project by notifying you to refresh the page to reflect the latest changes in the Headless CMS. | - |
| Preview URL | Webhook URL that provides the preview for pages in the Headless CMS. | https://{accountName}.vtex.app/api/preview |
Editing a project
After creating the project, you can also edit all the information you have set during the creation of it. have set during the creation of it. On the Projects main page, click Settings (⚙️), and a modal window will open with two tabs for General and Build settings.
Restoring default Sections URL
Once you have created the project and want to edit the Sections URL field click Edit, add the new webhook URL and click Save. If you want to restore the default URL, click Restore default.
Archiving a project
Archiving a project disables the API and access to the content within the project. To archive a project, follow the steps below:
- Go to Storefront > Projects.
- Choose the project you want to archive and click Settings (⚙️) to open a modal.
- Click
Archive projecton theGeneralpage. A pop-up message will appear to confirm that you want to archive the project.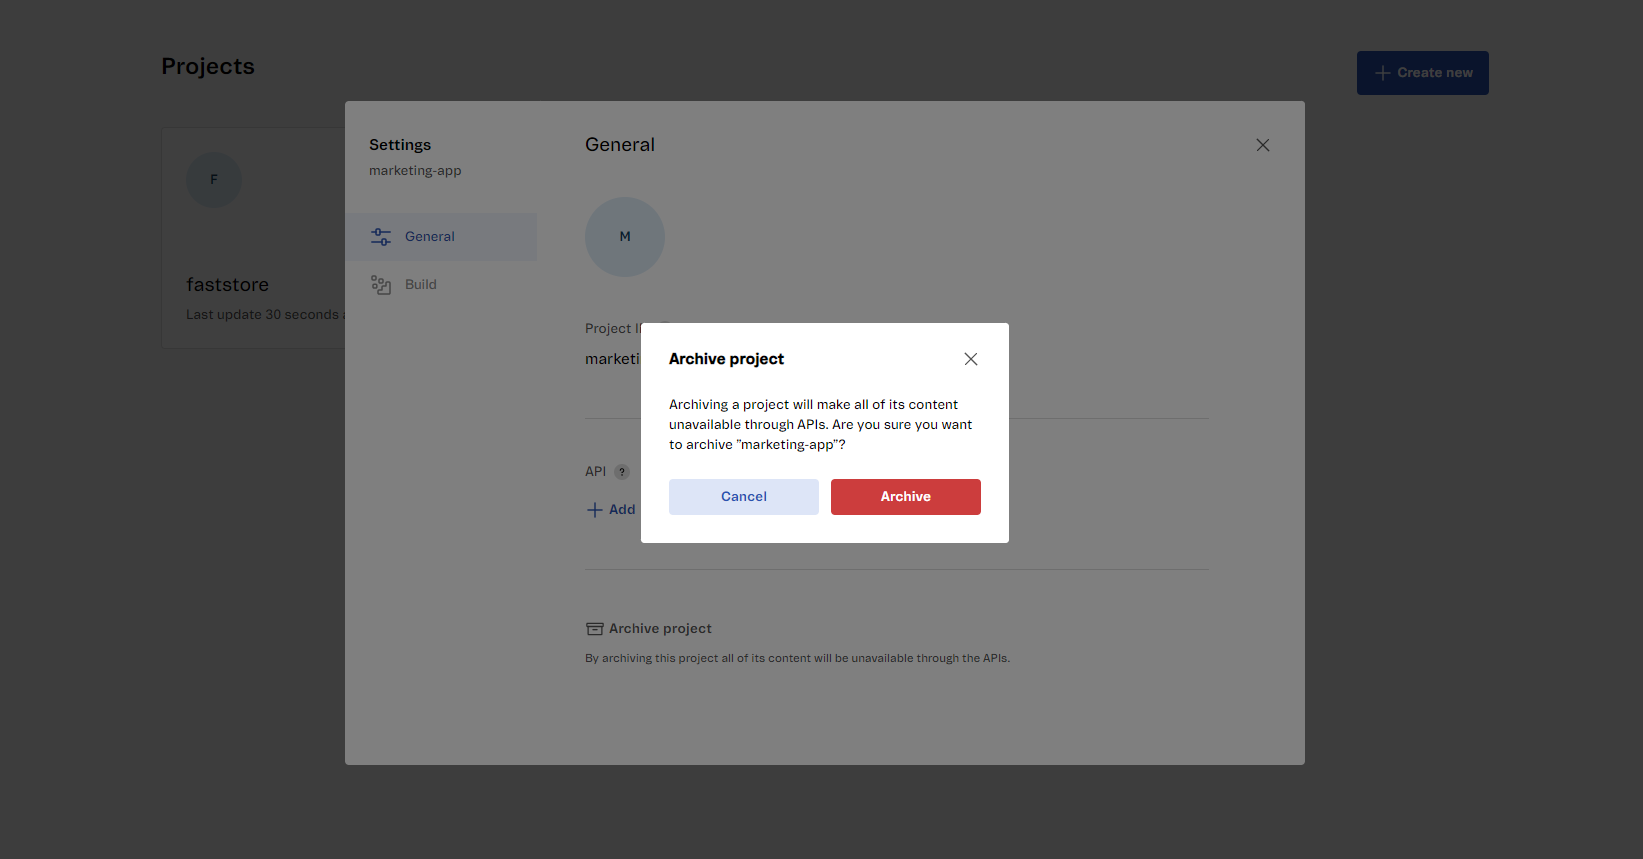
- Click
Archive. A message informing that the project was successfully archived will appear.
If you want to restore an archived project, follow the steps in Restoring a project.
Restoring a project
Restoring a project re-enables its API and allows the content within the project to be accessible once again. To restore the project, follow the steps below:
- Go to Storefront > Projects.
- Click the archived project card.
- Click
Restore project. A pop-up message will appear to confirm if you want to restore the project. - Click
Restore. A message informing that the project was successfully restored will appear.