How to Create a Web Channel
2 min read
When integrating the web channel, you can customize aspects of the Web Chat such as color, message spacing time, message indicators, avatar, and much more! This way, you ensure that the Weni Platform offers everything tailored to your brand. Below, we’ll guide you step by step to complete the integration.
Creating a Web Channel
- Access the organization: To integrate your chatbot with a web channel, first enter the organization where the project is located.
- Locate the project: Find the project you want to integrate with the web channel.
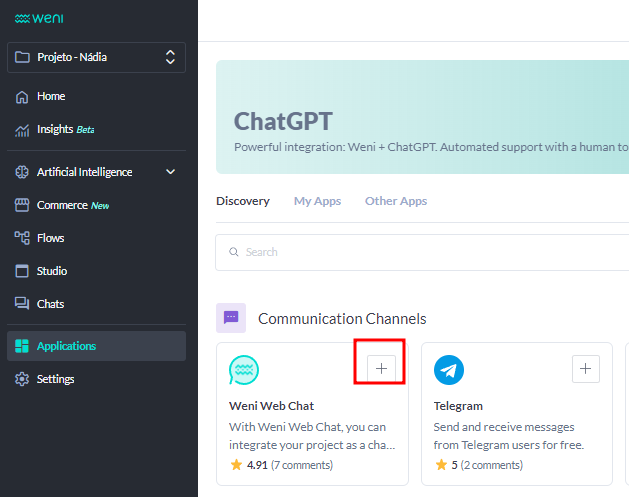
- In the sidebar, click on Applications.
- By clicking Applications > Discovery, select the Weni Web Chat option.
- Click the Access My Applications button, and then click on the Weni Web Chat card once again to access the customization settings.
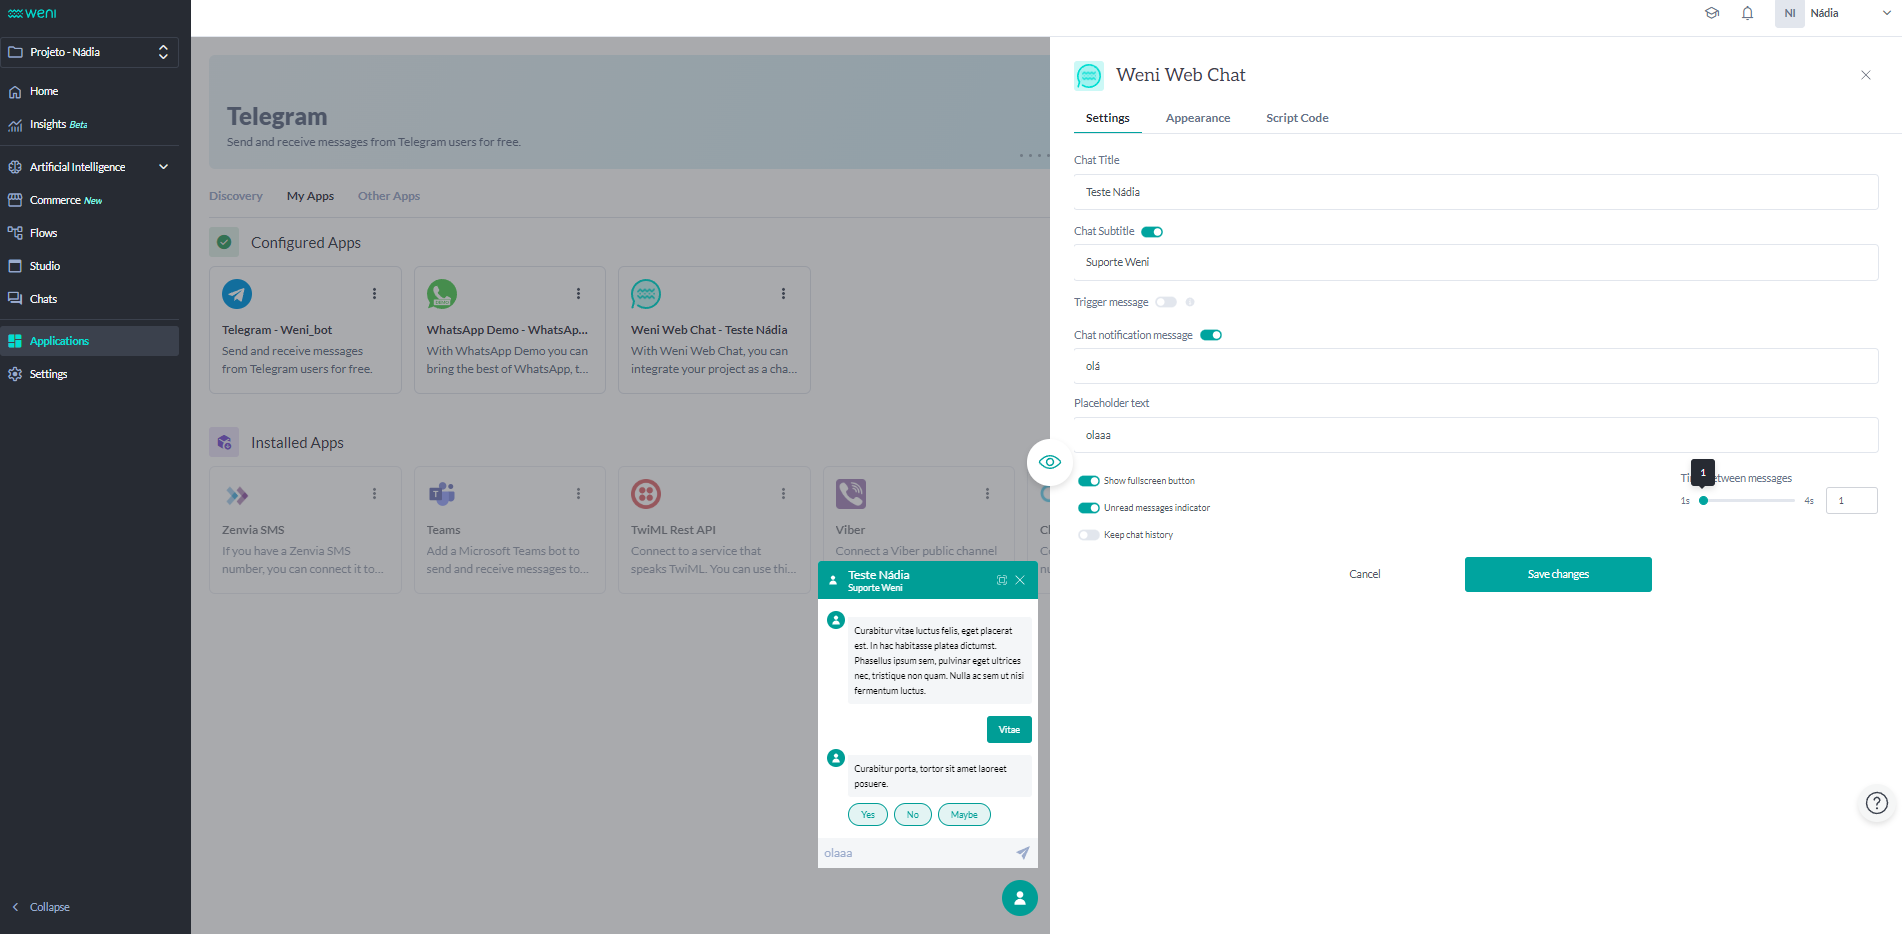
- When you open the Weni Web Chat customization panel, you will have the following options to configure:
- Chat Title;
- Chat Subtitle (optional);
- Trigger Message: When enabled, it is the first message your chatbot sends (optional);
- Chat Notification Message (optional);
- Show Full-Screen Button (optional);
- Unread Messages Indicator (optional);
- Keep Message History (optional);
- Time Between Messages.
These options allow you to tailor the chat experience to better match your brand and user preferences.
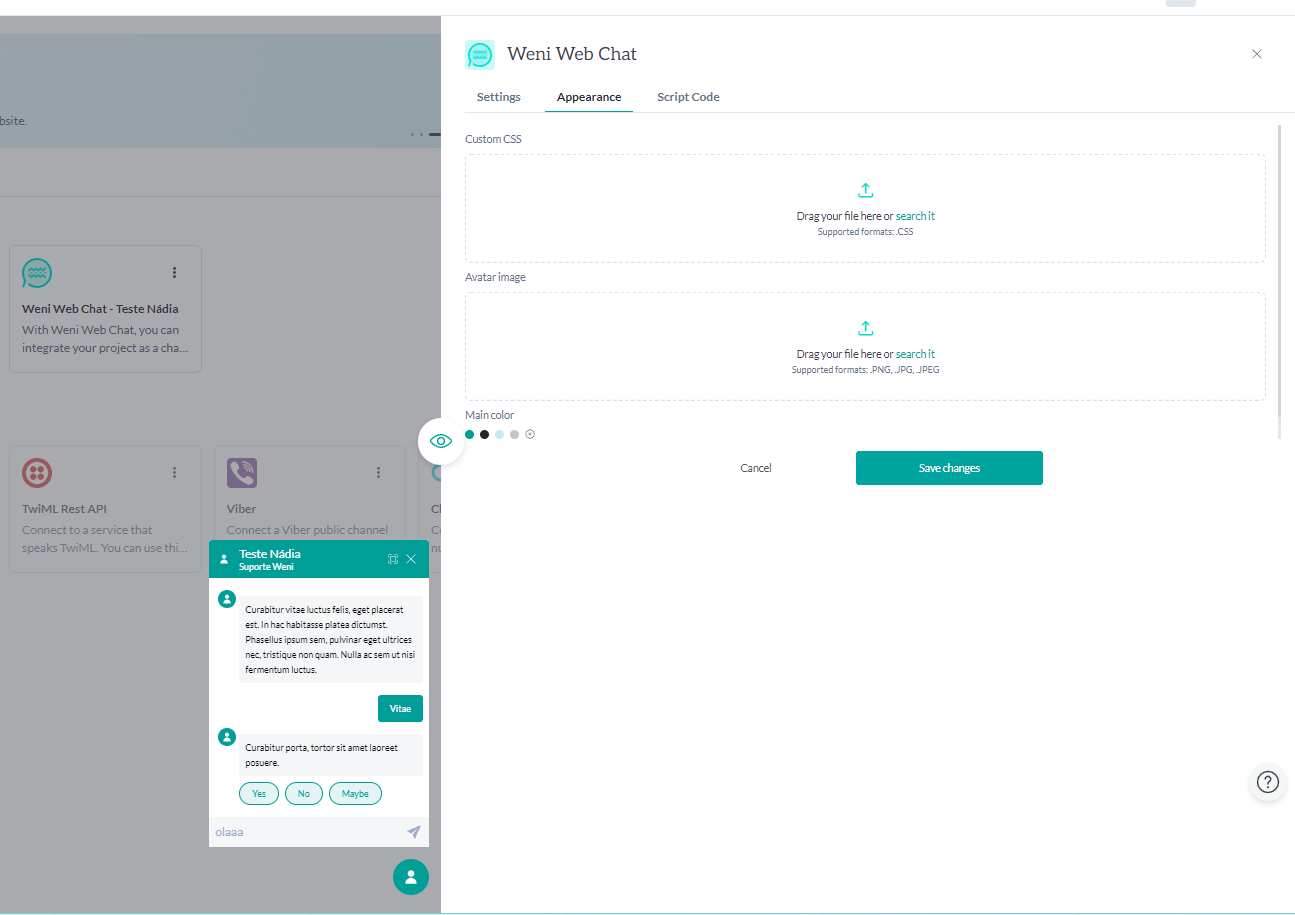
- Moving on to the Appearances tab, you have the option to customize the chat using CSS. Additionally, you can upload an image in PNG, JPG, or JPEG format to serve as your avatar, and you can also change the chat's color to match your brand.
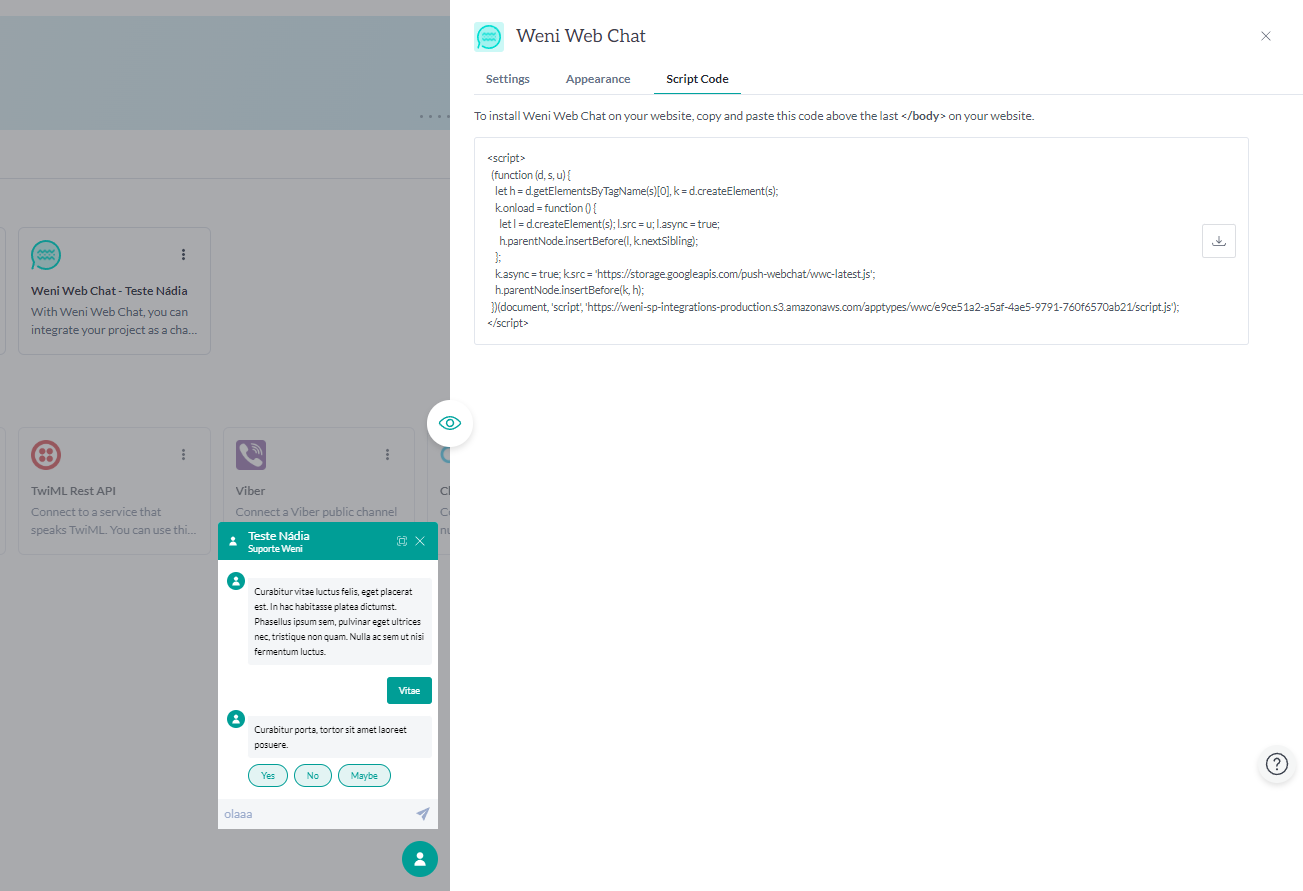
- After completing the customization, to install the Weni Web Chat on your website, copy the code that will appear when you click on script code, and paste it above the last
</body>tag on your website.