This article is about Master Data v1. If you want to use Master Data v2, see the steps in the guide Setting up triggers in Master Data v2.
Conceptually, a trigger is a programming resource that performs a specific action whenever an associated event occurs. In Master Data, a trigger consists of configuring one or more events that activate when a particular situation occurs based on different variables.
This enables diverse automations and data control, increasing the efficiency of your data management. A trigger is a feature that allows you to schedule actions to be executed when a triggering event occurs.
For example:
- A data entity contains the data of all your physical stores.
- A new record is added to this entity.
- A configured trigger sends an email to all customers with the updates.
Triggers allow you to schedule actions to be executed when certain conditions are met. Any information registered in Master Data can trigger many other actions as desired.
Below are the main characteristics of triggers:
- They are associated with a data entity.
- They activate automatically.
- They cannot be called directly.
- They trigger several actions.
- They allow creating recursion scenarios.
- They can impact the manipulation of the entity's data due to the previous aspect.
Trigger structure
Before creating a trigger, it's important to understand that configuring a trigger has four parts, which are explained below.
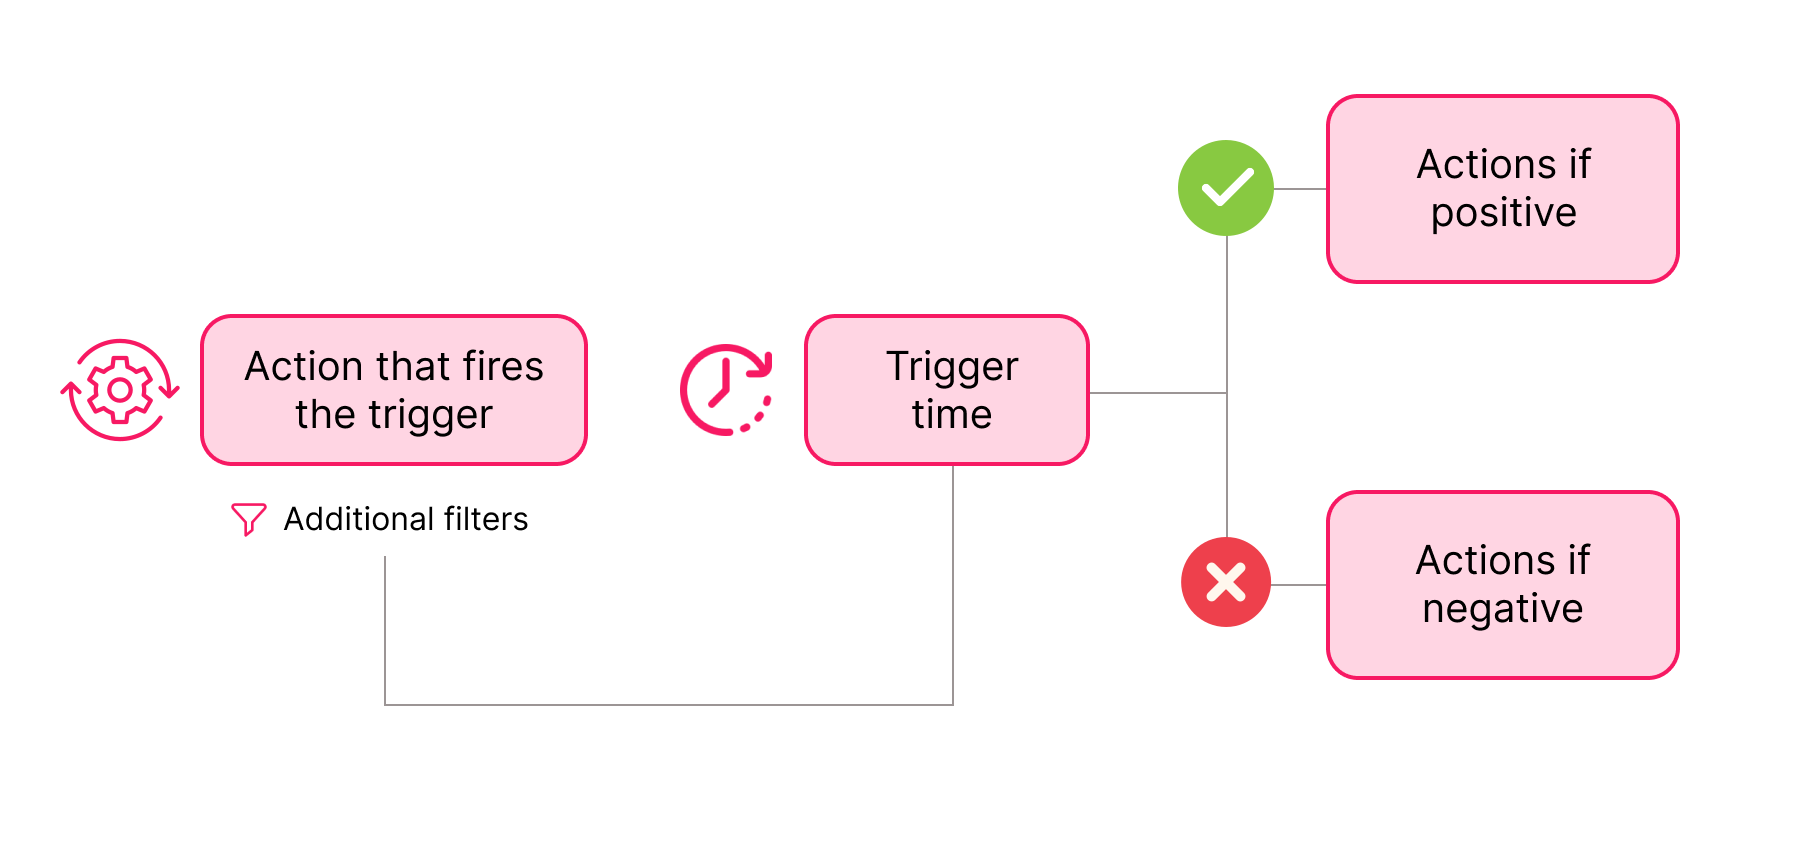
Action that fires the trigger
To configure this, you need to decide which action should trigger another action. This configuration is separated into two parts:
- Rule: Action that fires the trigger. Example: A new registration in the store.
- Additional filters: Conditions the action must meet for the response action to be executed, such as registration through a newsletter form and not through the checkout. Example: To trigger the action, registration must be done through the newsletter form, not checkout.
In this example, the trigger condition would be Every time a record is created, and in the additional filters, there should be a "source" field filtered by "newsletter". So, whenever a new registration is made, the trigger checks whether the customer registered via the newsletter. Only if this condition is met will the configured action be executed.
Trigger time
You can set multiple triggers separated by a time intervals. Or, even better, schedule the trigger based on the date of another field. For example, there is a Due date field in a Product entity record, and you want an API notification to be sent to another system 1 month before the due date. In this case, the trigger time will be the Due date minus 1 month.
Actions that will be executed if a record meets the trigger rule and filters
You must configure all the actions that will be executed when the record meets the conditions and filters. These actions can include sending an email or scoring a field of Score2 type, among other options, as detailed below.
Example: A scenario in which you want to score a field with every new order. Every time the customer places an order, 10 points are added to the current value of the Bonus field.
- Rule: When the Checkout attribute is changed.
- Additional filter: Checkout equal to Completed.
- If positive actions: Change the Bonus field (Score2 type), setting the bonus tag to 10 and valid for 30 days.
Actions that will be executed if a record meets the trigger rule but does not meet the filters
In this configuration, you must define actions that will only be executed if the record that meets the trigger condition does not meet the additional filters. Example:
- Rule: When a new record is created.
- Additional filter: Gender is equal to female.
- Actions if positive: Sends an email with deals from the female department.
- Actions if negative: Sends an email with deals from the male department.
Configuring triggers
Follow the instructions below to create a trigger in Master Data v1:
-
Access Master Data at
https://{accountname}.ds.vtexcrm.com.br/, replacing{accountname}with your VTEX account name. -
Click the Trigger tab.
-
Click the
Addbutton. -
Enter the Name of the trigger.
-
Select the data entity that will fire the trigger.
-
After selecting the data entity, the other configuration fields will be displayed.
-
Select a status for the trigger, which can be Enabled or Disabled.
-
Configure each of the tabs based on the sections:
-
Click
Save.
Rules
In this section, you must set the conditions that will fire the event(s) configured in the trigger.
Trigger rules
-
An attribute value is changed: When the value of the field below is changed in any record, the trigger will be enabled.
In the Field option, select the field that will be used. For example: If the trigger should be fired when the Email field is changed, select the Email field.
-
A filter attribute is changed: The trigger will be fired when a filter attribute is changed.
-
A record is changed: The trigger will be fired when a record is changed in any field.
-
A record is created: The trigger will be fired when a record is created.
-
A record is deleted: The trigger will be fired when a record is deleted.
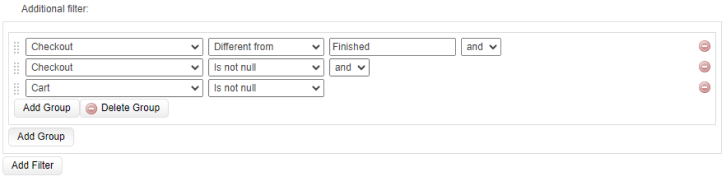
Additional filters
-
Add Group: Creates groups with filters. Each group can be related to the others, creating more complex filter layers.
-
Add Filter: You can create a filter within the last group created or independently of groups. A filter always interacts with other filters based on the set arrangement, with the "and" and "or" options for each.
Select which fields and values are accepted or not for the trigger to be fired.
Master Data v1 does not allow the configuration of trigger reattempts, unlike Master Data v2.
Schedule
This tab allows you to configure when the trigger should be fired:
- Run ASAP: Immediately.
- Schedule on specific date: Schedule for a specific date and time in the calendar.
- Schedule on dynamic date: Set a future date, starting from the current date or the date of a date field. You can use minutes, hours, days, months, and years.
If Positive
In this tab, you must configure the events to be triggered if the record that triggered the event meets all the additional filters.
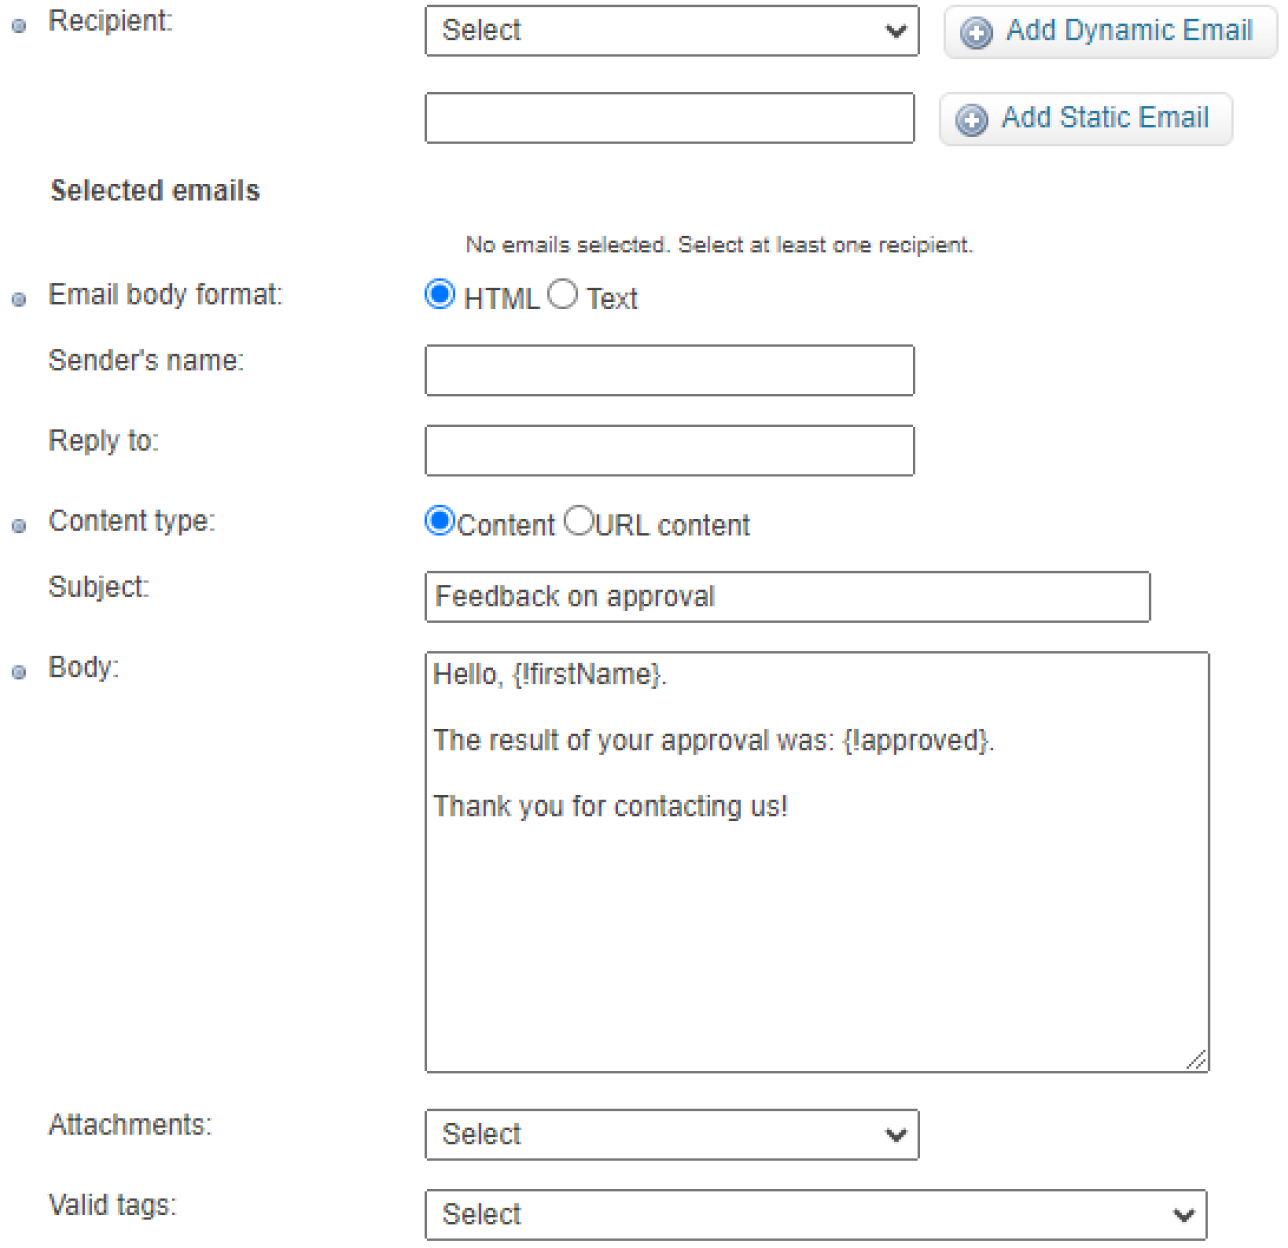
Send an email
Sends an email to dynamic (specified in the record) or static recipients. The email content can be customized to include text, HTML, or even URL content. You can also add attachments, and the Valid tags field shows how to enter field values in the record.
Send an email using a VTEX Message Center template
Sends an email using an existing Message Center template.
Add scores to the Score2 field
A Score2 field is a special type of data that stores three pieces of information: key, points, and validity. You can define a value for each score and save it in a field of this type.
Send an HTTP request
Sends an HTTP request, allowing you to save the response details in Master Data.
Complete the Request information section with the request details you want to send. In the Response action section, you can indicate how the response details should be saved in Master Data.
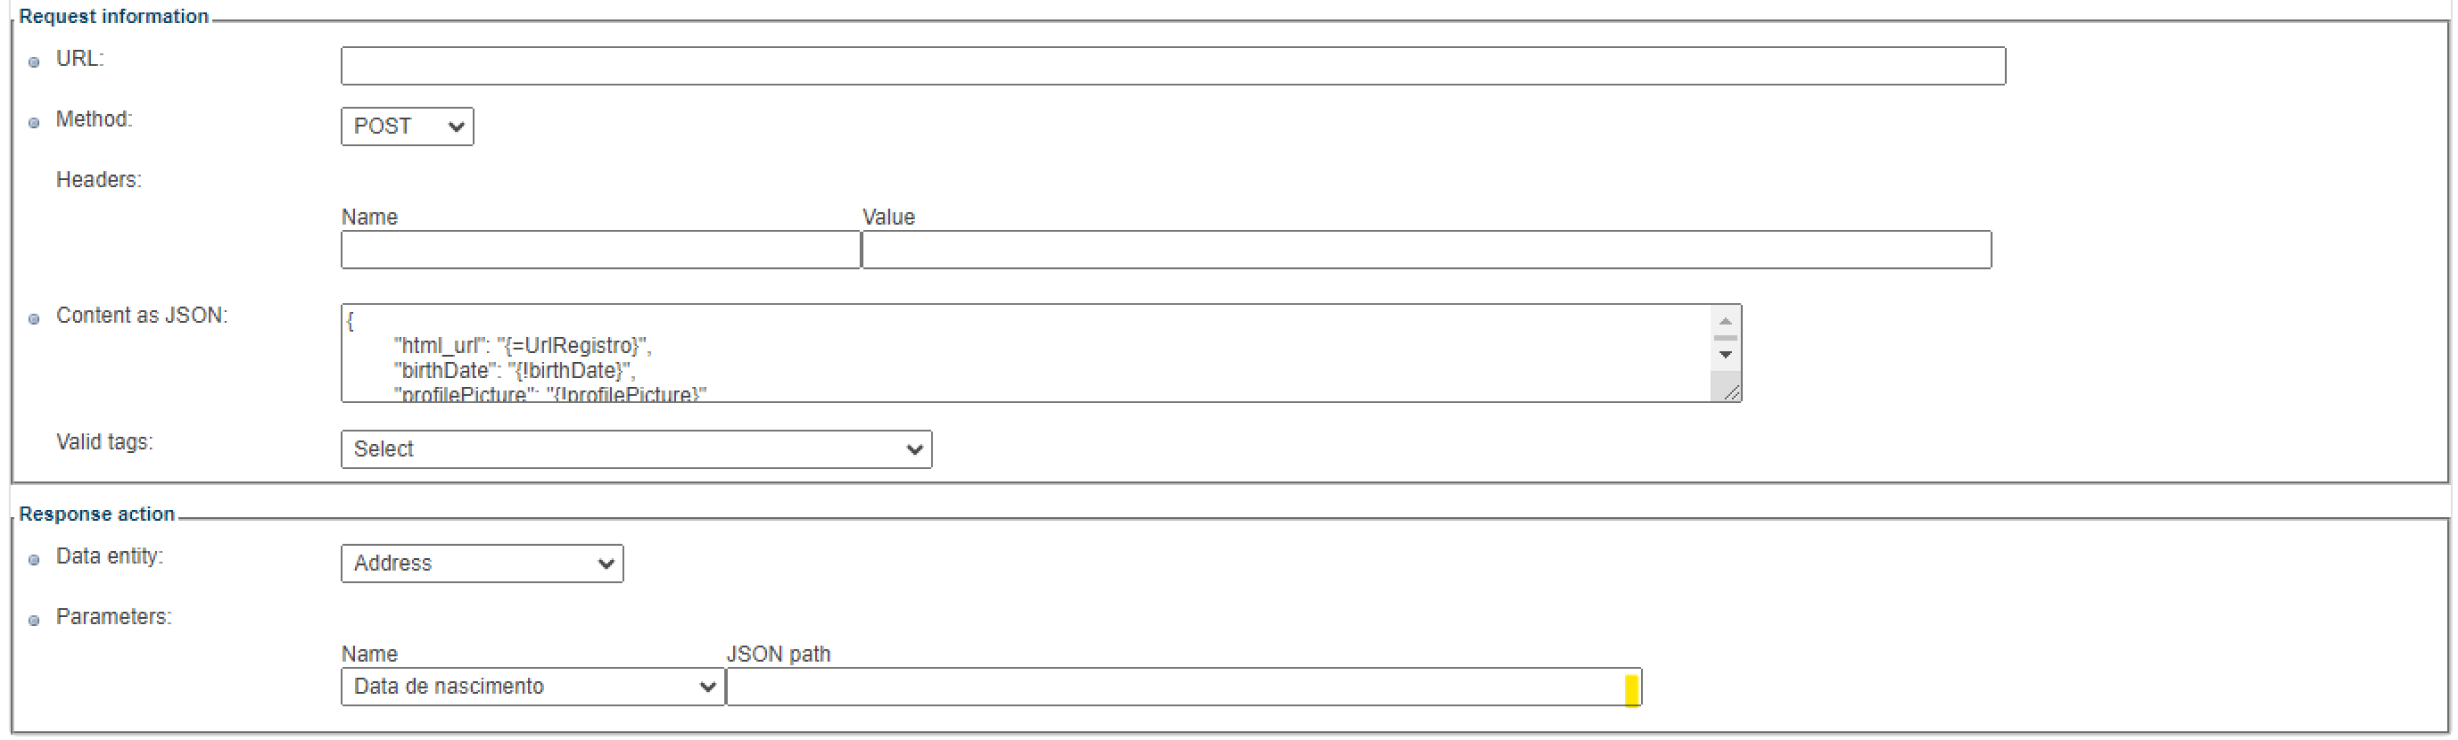
To configure the Response action, select the desired data entity and set the corresponding JSON path in the response for each field to be saved.
If Negative
Events will be triggered when the record does not meet the trigger additional filters. The same events can be configured for actions if positive.