There are two ways to configure collections, through the CMS or the Collection module (Beta). This article is about how to configure collections through the Legacy CMS Portal.
The <vtex.cmc:HightLight/> control (for product pages) or $product.HightLight control (for shelves) renders an HTML element with a specific class in the context of products that are part of a collection marked with the Highlight flag.
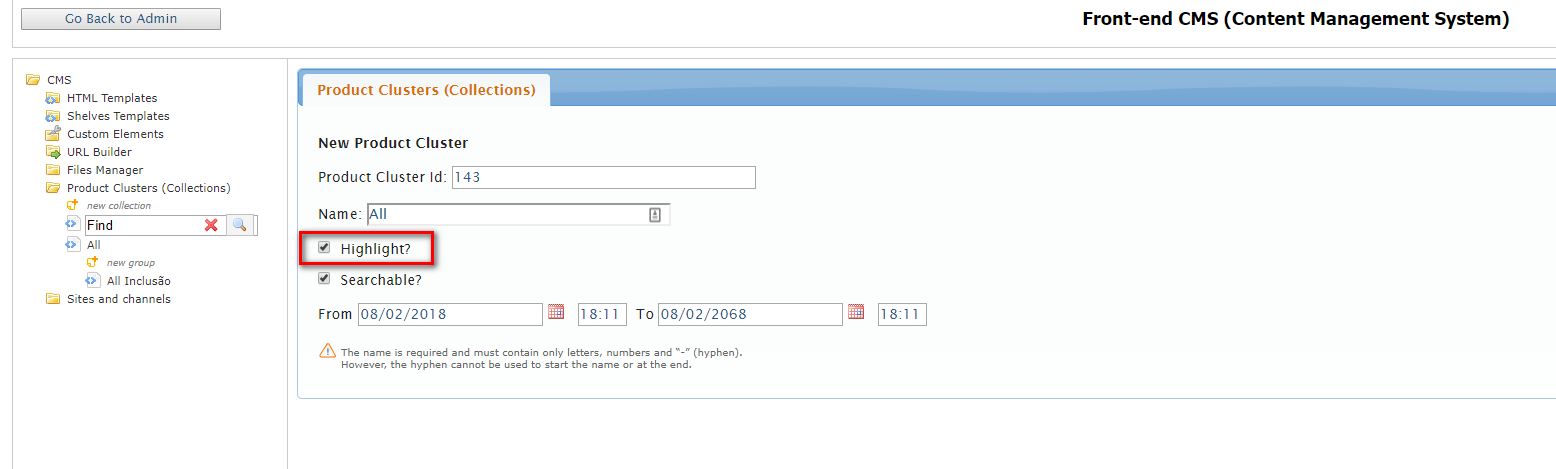
First, let's see where the Highlight flag is:
- Access the Admin.
- Go to Storefront > Layout.
- Click the CMS folder and then the Product Clusters (Collections) folder.
- Click a collection.
- Check the Highlight flag, which is on the collection screen, and then click Save Product Cluster.
By flagging it, you inform the system that whenever the highlight control is used in a page template, the products displayed on that page that are part of the collection must appear with the HTML element below, where in place of {CollectionName} appears the name of the collection registered in the CMS:
<p class="flag {CollectionName}">{CollectionName}
You can then customize the CSS to define how the flag {CollectionName} class will affect the display of the products.
This feature can be used, for example, to make products in a collection called "Launch" always appear with a flag highlighting that they are new to the store. When you add the control to the category page template, for example, every product in the Launch collection that appears on a category page will be shown with that highlight.
Remember that if it's a product page, the control that should be used is
<vtex.cmc:HightLight/>. If it's a shop window page, you should use the$product.HightLightcontrol.