This feature is only available for stores developed using VTEX IO. Before proceeding, you need to install and configure Product Customizer in your store.
An assembly option is an attachment for complex scenarios, such as product customization, in which you need to manage different product combinations, quantity, additional items, costs, and product inventory management.
In the example below, a store offers multiple assembly options for the Custom Bell product. These options are shown on the product page, where the customer can select the desired options. Depending on the choices, there may be an additional cost for the SKU.
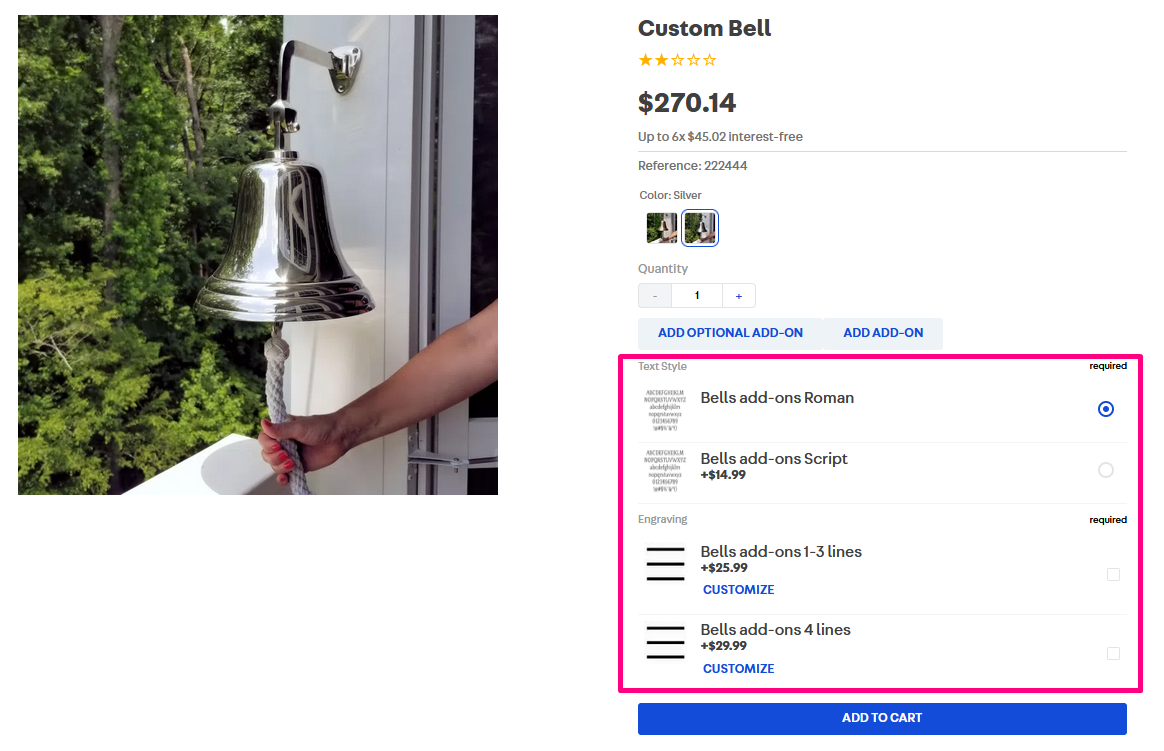
You can combine SKUs to provide assembly options, such as the Bells add-ons Roman or the Bells add-ons 1-3 lines in the example above. If an item is out of stock, it will be shown as unavailable.
This article will explain how to start using Assembly Options in your store.
Implementing Assembly Options
There are two ways to implement Assembly Options: using the Assembly Options app or the native Catalog Custom Product Attributes interface.
If you implement Assembly Options in a seller account, the product customization options will be displayed to your customers at checkout. If you want the options to be displayed on the product page, you need to install the app in a marketplace account.
Assembly Options App
The Assembly Options app, available for stores developed with VTEX IO, provides an interface for configuring and managing custom options. In this case, the assembly option syntax and attachment are automatically generated. Please refer to the Assembly Options App user guide to learn more about the app.
Custom Product Attributes
To create Assembly Options using Attachments in VTEX Admin, you must manually create a syntax to define the product customization rules. Then, enter that syntax in the attachment configuration. Check out the following sections for more details.
Assembly Options syntax
To implement an assembly option, first you need to create a syntax, such as the one below, by changing each value according to your scenario.
[0-3]#10000[1-2][1]pricetable1;#20000[0-2][0]pricetable2;#30000[0-2][0]pricetable3
The first elements [x-y] are group rules, and between each # and ; are SKU component rules. Learn more about each segment of this syntax in the table below.
| Segment | Description |
|---|---|
| [0-3]#10000[1-2][1]pricetable1;#20000[0-2][0]pricetable2;#30000[0-2][0]pricetable3 | Minimum and maximum quantity of items that can be selected from the group. The first segment defines how many choices this assembly accepts in total. [0-3] means that you can select a minimum of zero items and a maximum of three. If the value is [1-1], it means that you can only select one item out of all the options. |
| [0-3]#10000[1-2][1]pricetable1;#20000[0-2][0]pricetable2;#30000[0-2][0]pricetable3 | After each #, you must include the SKU ID of the component. You must use at least one SKU in the assembly options. |
| [0-3]#10000**[1-2][1]pricetable1;#20000[0-2][0]pricetable2;#30000[0-2]**[0]pricetable3 | This segment defines the minimum and maximum quantity of each SKU that the end customer can select. If the value is [0-1], it means that there can be up to one of this SKU. |
| [0-3]#10000[1-2]**[1]pricetable1;#20000[0-2][0]pricetable2;#30000[0-2][0]**pricetable3 | This segment defines the default selected quantity for each SKU. |
| [0-3]#10000[1-2][1]pricetable1;#20000[0-2][0]pricetable2;#30000[0-2][0]pricetable3 | The final segment indicates the price table for each item. |
Attachment Settings
To add an Assembly Option, you need to have an attachment already created. Check the article Adding an attachment to learn how to create one.
After adding an attachment and associating it with an SKU, follow the steps below to configure the Assembly Option.
- In the VTEX Admin, go to Catalog, or type Catalog in the search bar at the top of the page.
- Click Custom Product Attributes.
- In the Service and SKUs tab, choose the attachment to which you want to add the Assembly option and click
Modify. - In the Permitted Values field, insert the syntax you created, as described in the Assembly Options syntax section.
- Click
Save.