On VTEX, you can integrate with the easypay payment provider. This connector enables your store to sell using easypay, MBWay, and MultiBanco.
To use the easypay affiliation in your marketplace, you need to:
- Install the easypay app
- Configure the easypay app
- Configure the easypay webhook
- Configure the easypay affiliation
If your store is not a marketplace, read Setting up payment with easypay or Setting up payments with easypay seller.
Install the easypay app
To install the easypay app, follow the steps below:
- In the VTEX IO CLI, run the command
vtex login accountnameto log in to your account. - Install the easypay app using the
vtex install easypaypartnerpt.payment-provider-easypaycommand.
Configure the easypay app
After installing the easypay app, you need to configure it. To access the settings screen, follow the steps below:
- In the VTEX Admin, go to Extensions Hub > App Management, or type App Management in the search bar at the top of the page.
- Find the Easypay Payment Provider app and click Settings.
Configuration is divided in four sections:
- easypay credentials (required)
- Payment (required)
- Customizing the easypay checkout (required)
- Sandbox mode
You must set up the following configurations in the easypay environment. easypay controls these settings, therefore, VTEX does not guarantee that the steps below will be permanently updated. Use this document as a reference and check your easypay environment for up-to-date information.
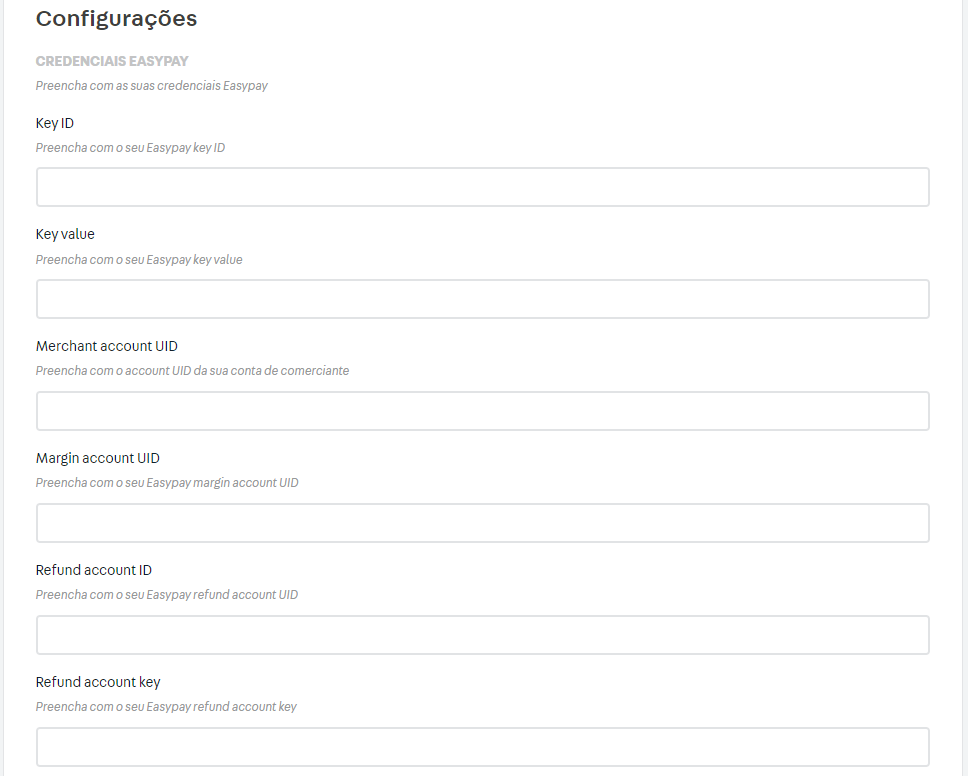
easypay credentials
The information in this section must be completed.
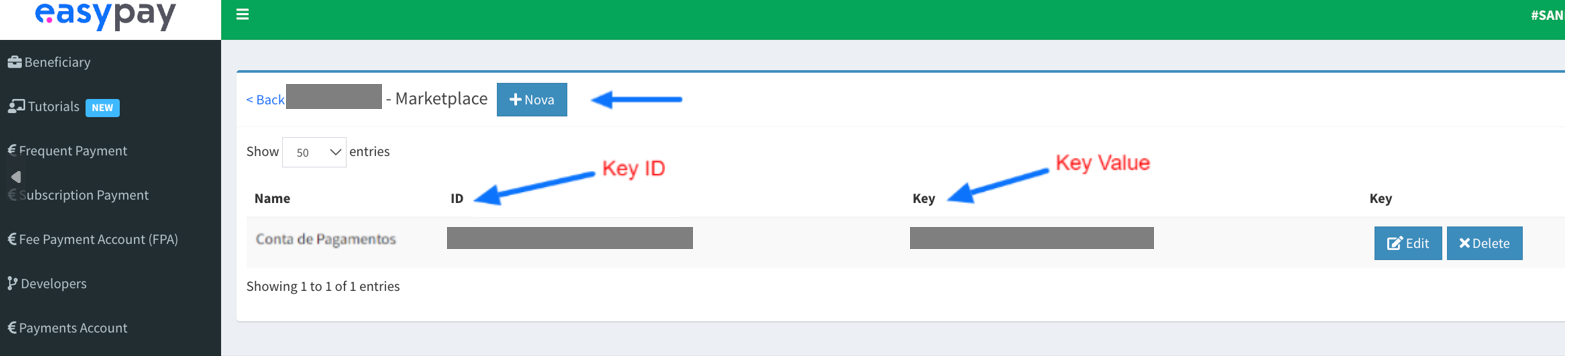
Key ID e Key Value: easypay key value and ID.

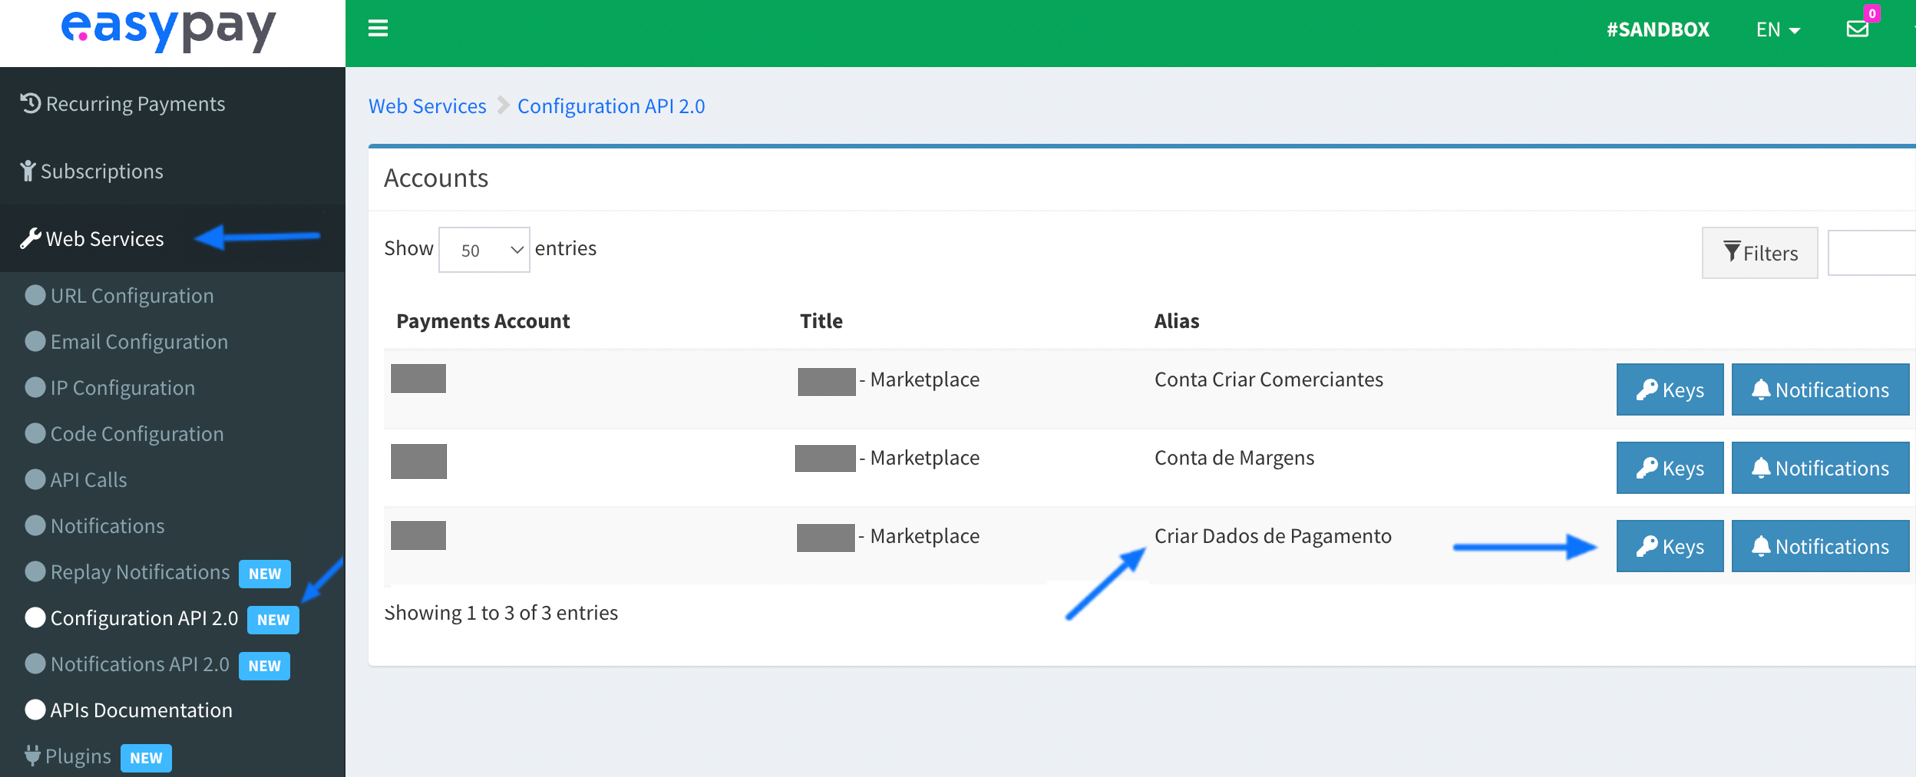
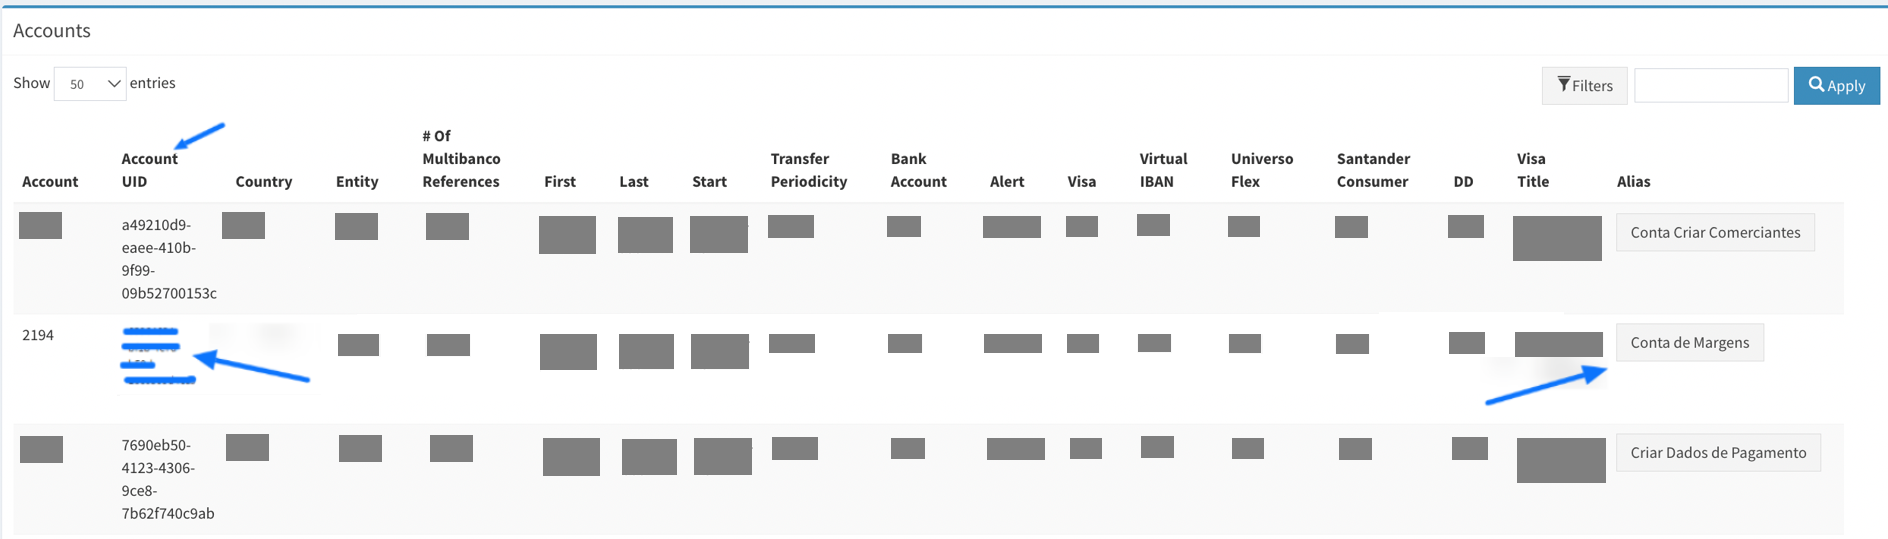
Merchant account UID: identification of the merchant account where purchase amounts from store sales will be deposited. If there is no separate merchant account, you can use the "Account UID" of the payment account.


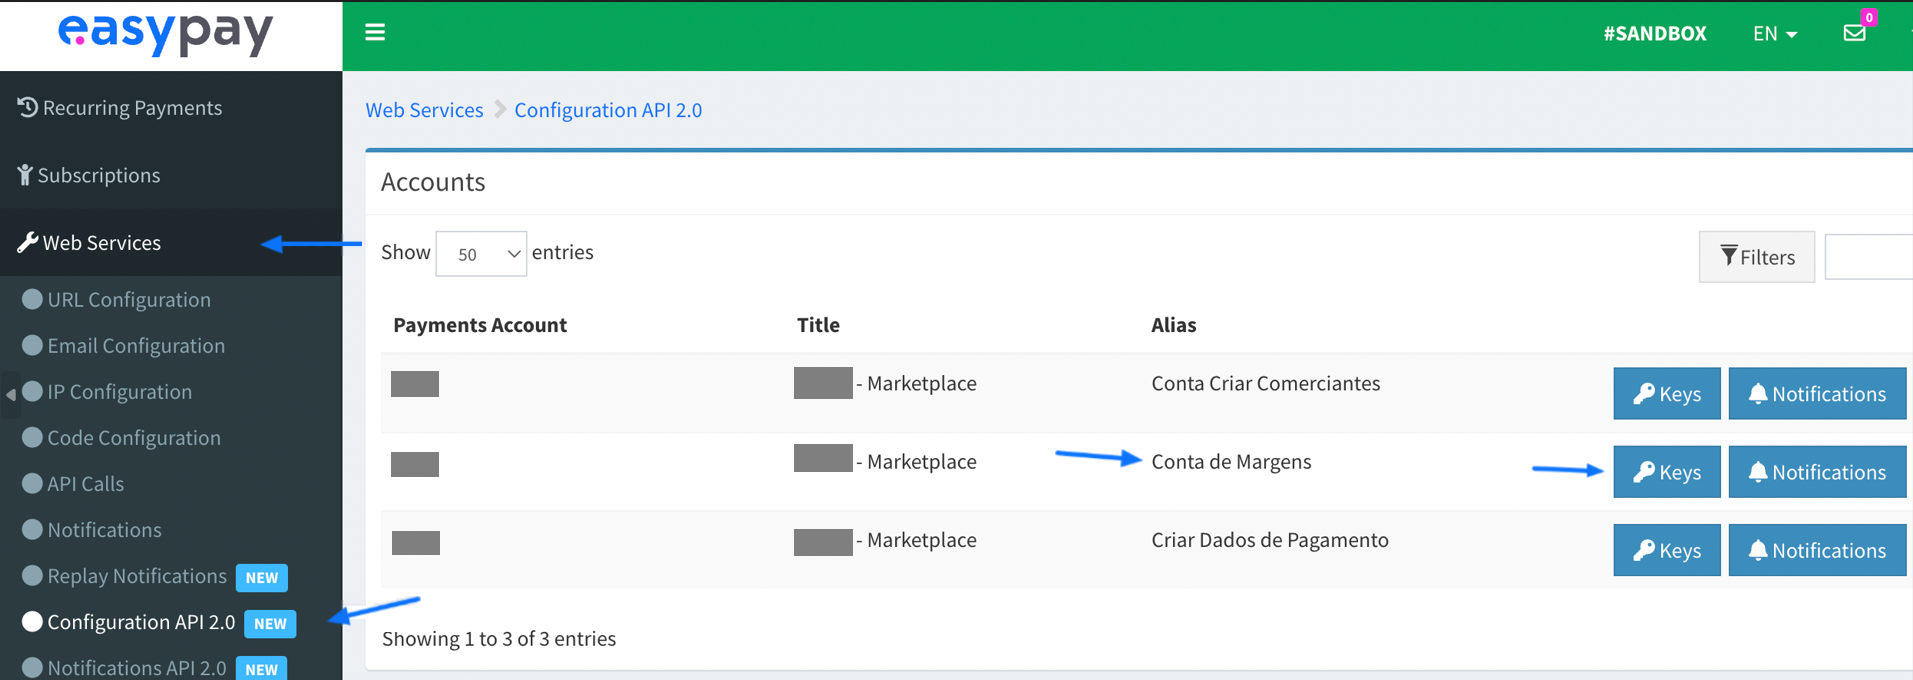
Margin account UID: identification of the margin account.
- In the side menu of the easypay environment, click Beneficiary.
- Copy the information and save the Account UID information available in Margin Account.
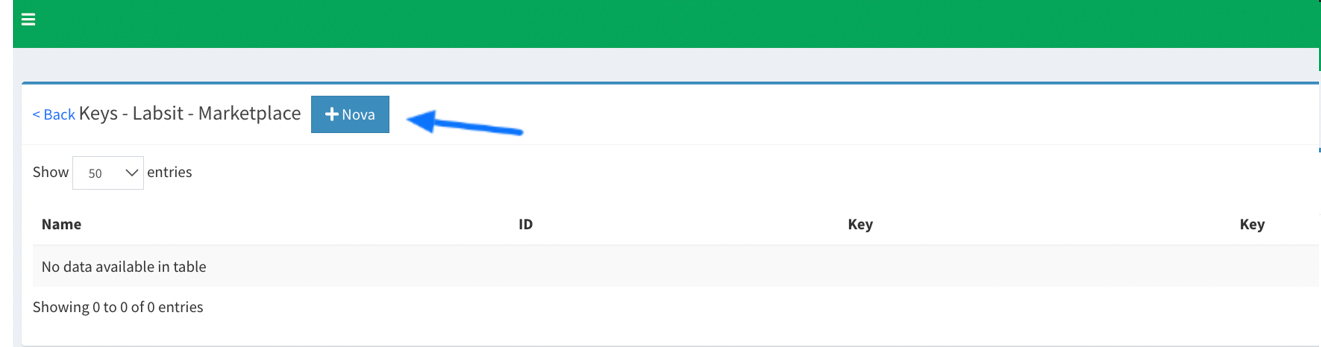
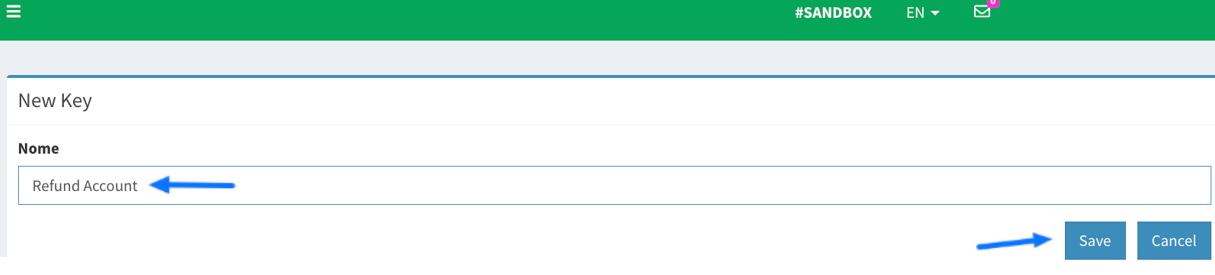
Refund account ID and Refund account key: easypay refund keys ID and value.
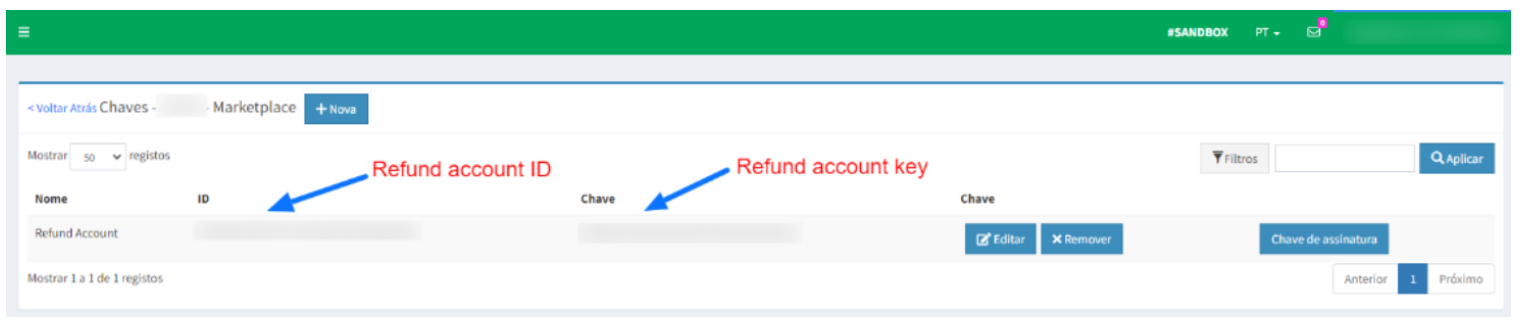
Refunds are debited directly from a marketplace account. Later, the marketplace must request the refunded amount from the seller.
Payment
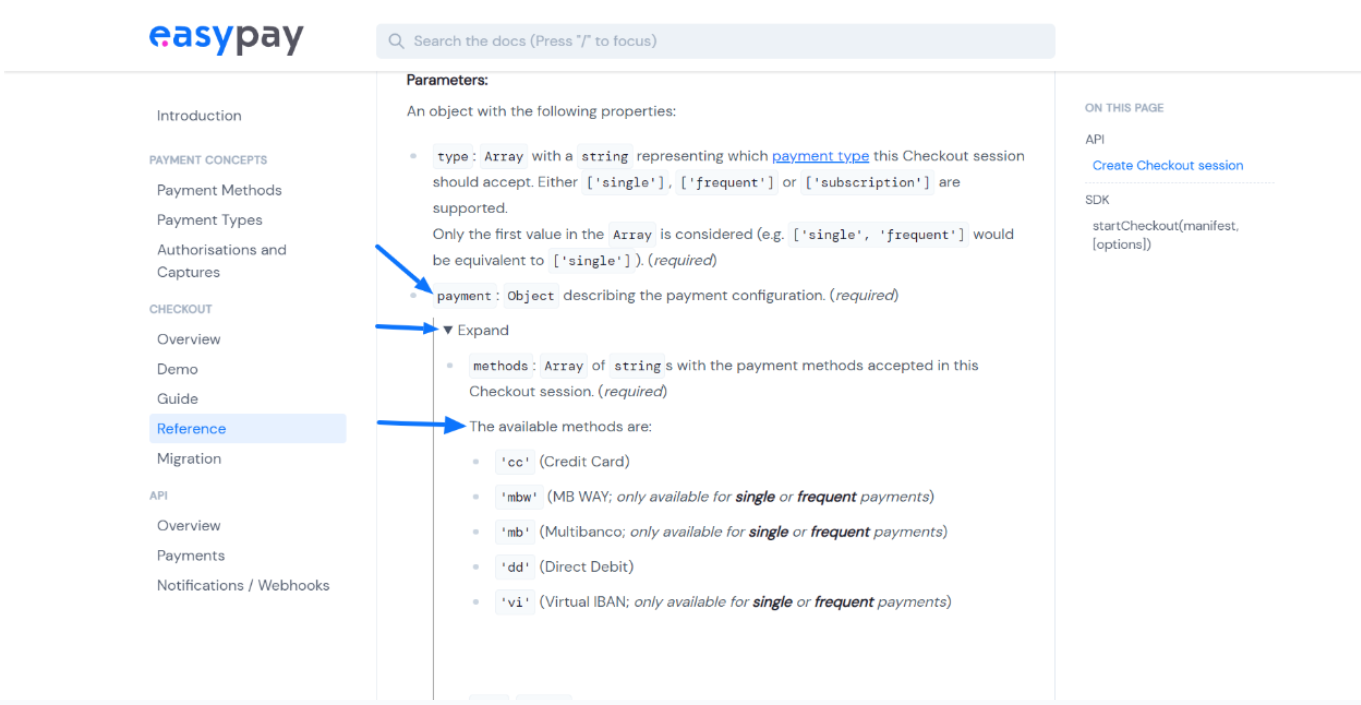
In this section, you must indicate whether your store will use asynchronous and/or synchronous payments. See the easypay documentation to check the available payment methods and their identification acronyms.
Example:
| Correct | Incorrect |
|---|---|
| mb,dd,vi | mb, dd, vi |
If you complete this field, you must also complete the Expiration days for asynchronous payments field.
Accepted synchronous payment types: synchronous payment methods available to the customer. Only enter the acronyms of the synchronous payment types, separated by commas without periods or spaces.
Example:
| Correct | Incorrect |
|---|---|
| cc,mbw | cc, mbw |
Expiration days for asynchronous payments: expiration period, in days, for asynchronous payments. Only enter the desired number of days.
Example:
| Correct | Incorrect |
|---|---|
| 10 | 10 days, Dec, or 05/10/2023 |
Customizing the easypay checkout
easypay has a native checkout layout configured in the app. See below:
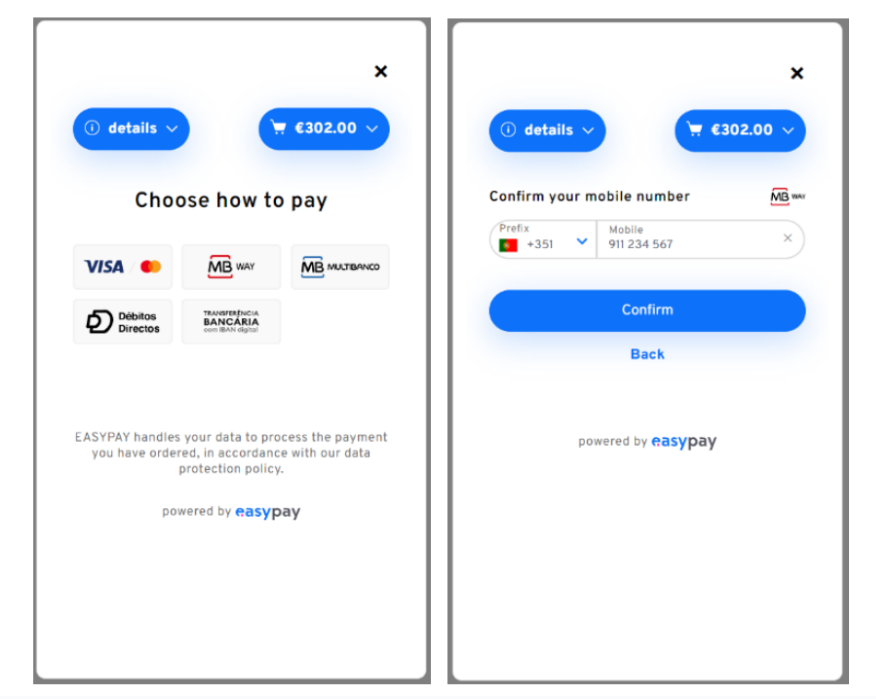
If you want to customize easypay's native checkout, complete one or more fields in this section:
- Checkout logo URL: logo displayed at the easypay checkout. Enter the link to the image you want to use
- Checkout background color: background color. Enter the HEX code of the desired color. Native default: #ffffff.
- Checkout accent color: highlight color, button pattern, and input borders. Enter the HEX code of the desired color. Native default: #0d71f9.
- Checkout error color: error message color. Enter the HEX code of the desired color. Native default: #ff151f.
- Checkout input background color: input background color. Enter the HEX code of the desired color. Native default: transparent.
- Checkout input border color: input border color. Enter the HEX code of the desired color. Native default: the same color used in the accent color.
- Checkout input border radius: allows you to define the rounded borders of the inputs. Enter the desired value in pixels (numbers only). Native default: 50 pixels.
Example:
| Correct | Incorrect |
|---|---|
| 35 | 35px |
- Checkout button background color: background color of the buttons. Enter the HEX code of the desired color. Native default: the same color used in the accent color.
- Checkout button border radius: allows you to set the rounded borders of the buttons. Enter the desired value in pixels (numbers only). Native default: 50 pixels.
Example:
| Correct | Incorrect |
|---|---|
| 30 | 30px |
-
Checkout button box shadow: option to enable or disable the button shadow.
-
Checkout font family: fonts used in texts. Enter the generic family name, web-safe font, or font link. Native default: Overpass. Example, correct: sans-serif, verdana, ou https://fonts.gstatic.com/s/overpass/v12/qFda35WCmI96Ajtm83upeyoaX6QPnlo6_PPbM5qKl8Kuo8AzesE.woff2
-
Checkout base font size: allows you to set the font size in the root element. Enter the desired value in pixels (numbers only). Native default: 10 pixels.
Example:
| Correct | Incorrect |
|---|---|
| 11 | 11px |
Do not use fonts over 12 pixels, as they can blur the layout.
Sandbox mode
To enable the development test environment, select the Enable sandbox mode option. You must use test credentials.
After completing the configuration fields, click Save.
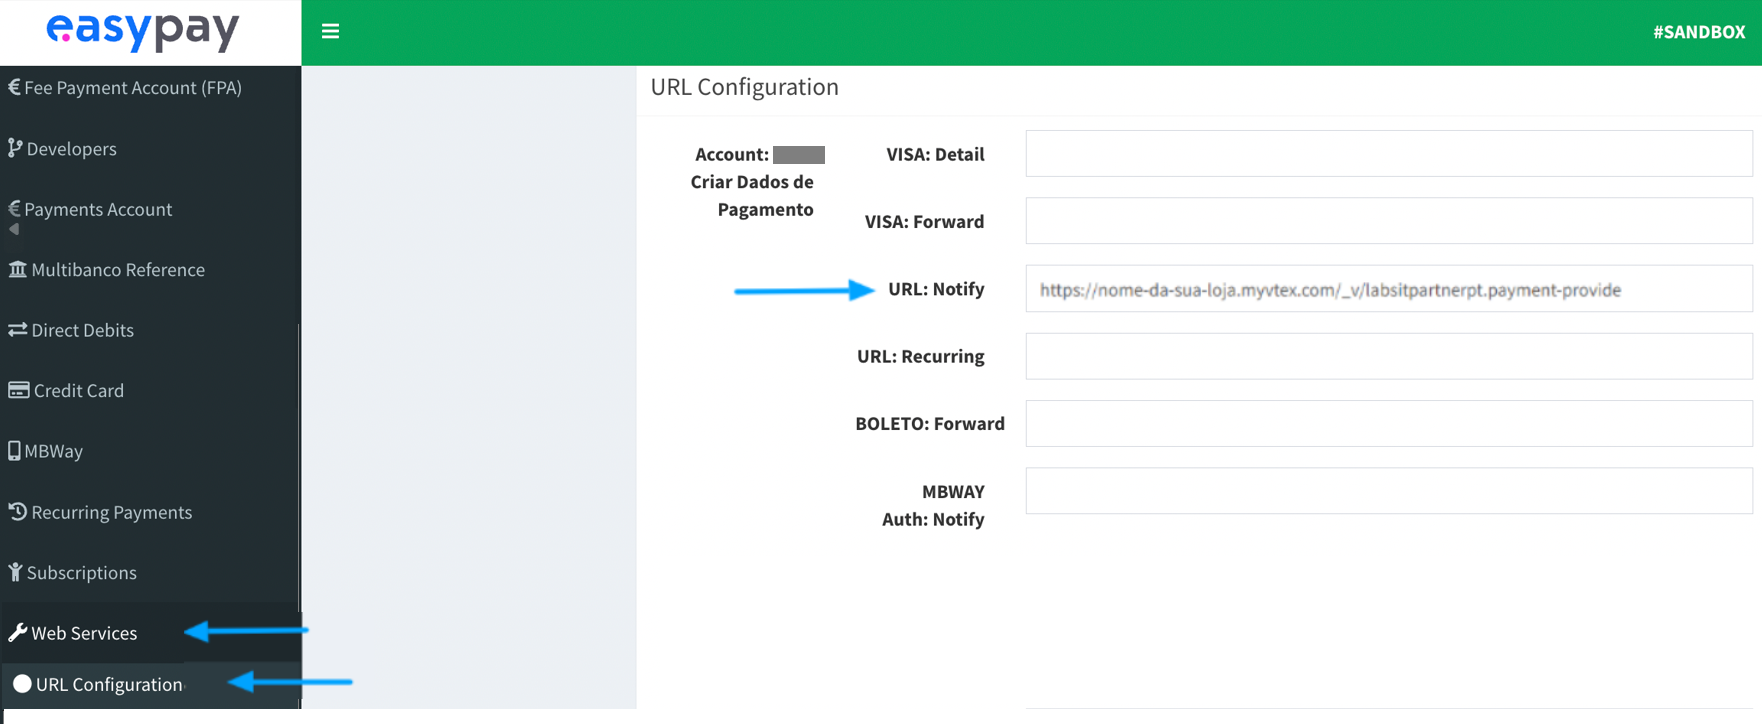
Configure the easypay webhook
To configure the easypay webhook, follow the steps below:

https://{your-account-name}.myvtex.com/_v/easypaypartnerpt.payment-provider-easypay/webhook
If there is more than one payment account in your marketplace, add a link to each of the existing accounts.
Configure the easypay affiliation
To configure the easypay affiliation, follow the steps below:
- In the VTEX Admin, go to Store Settings > Payment > Settings, or type Settings in the search bar at the top of the page.
- In the Gateway Affiliations tab, click the
+button. - Click the easypay connector.
- Complete the App Key and App Token fields with your easypay account information.
- If you wish to modify the identification name to be displayed for the easypay provider on the VTEX Admin screen, enter the information in the Name field in Basic Information.
- In Payment Control, select whether you want to activate the provider in a test environment by clicking Enable test mode.
- If you want to use payment split in your store, select the option Enable payout split and send payment recipients and indicate the Accountable for payment processing charges and Accountable for chargebacks (marketplace, sellers or marketplaces and sellers).
- Click
Save.
To configure the payment methods that easypay will process, read the Configuring payment conditions article.
To set special conditions for payment methods, read Configuring payment special conditions.
After following the instructions, it can take up to 10 minutes for the easypay connector to be displayed as a payment option at your store checkout.
(https://help.vtex.com/pt/tutorial/condicoes-especiais--tutorials_456#).