The B2B Organizations app allows you to group B2B users into organizations. You can assign specific payment methods, price lists, and product collections to each organization, allowing all users in the organization to share the same commercial conditions. Each organization is segmented into one or more cost centers, each with its own shipping address.
Accessing a buyer organization
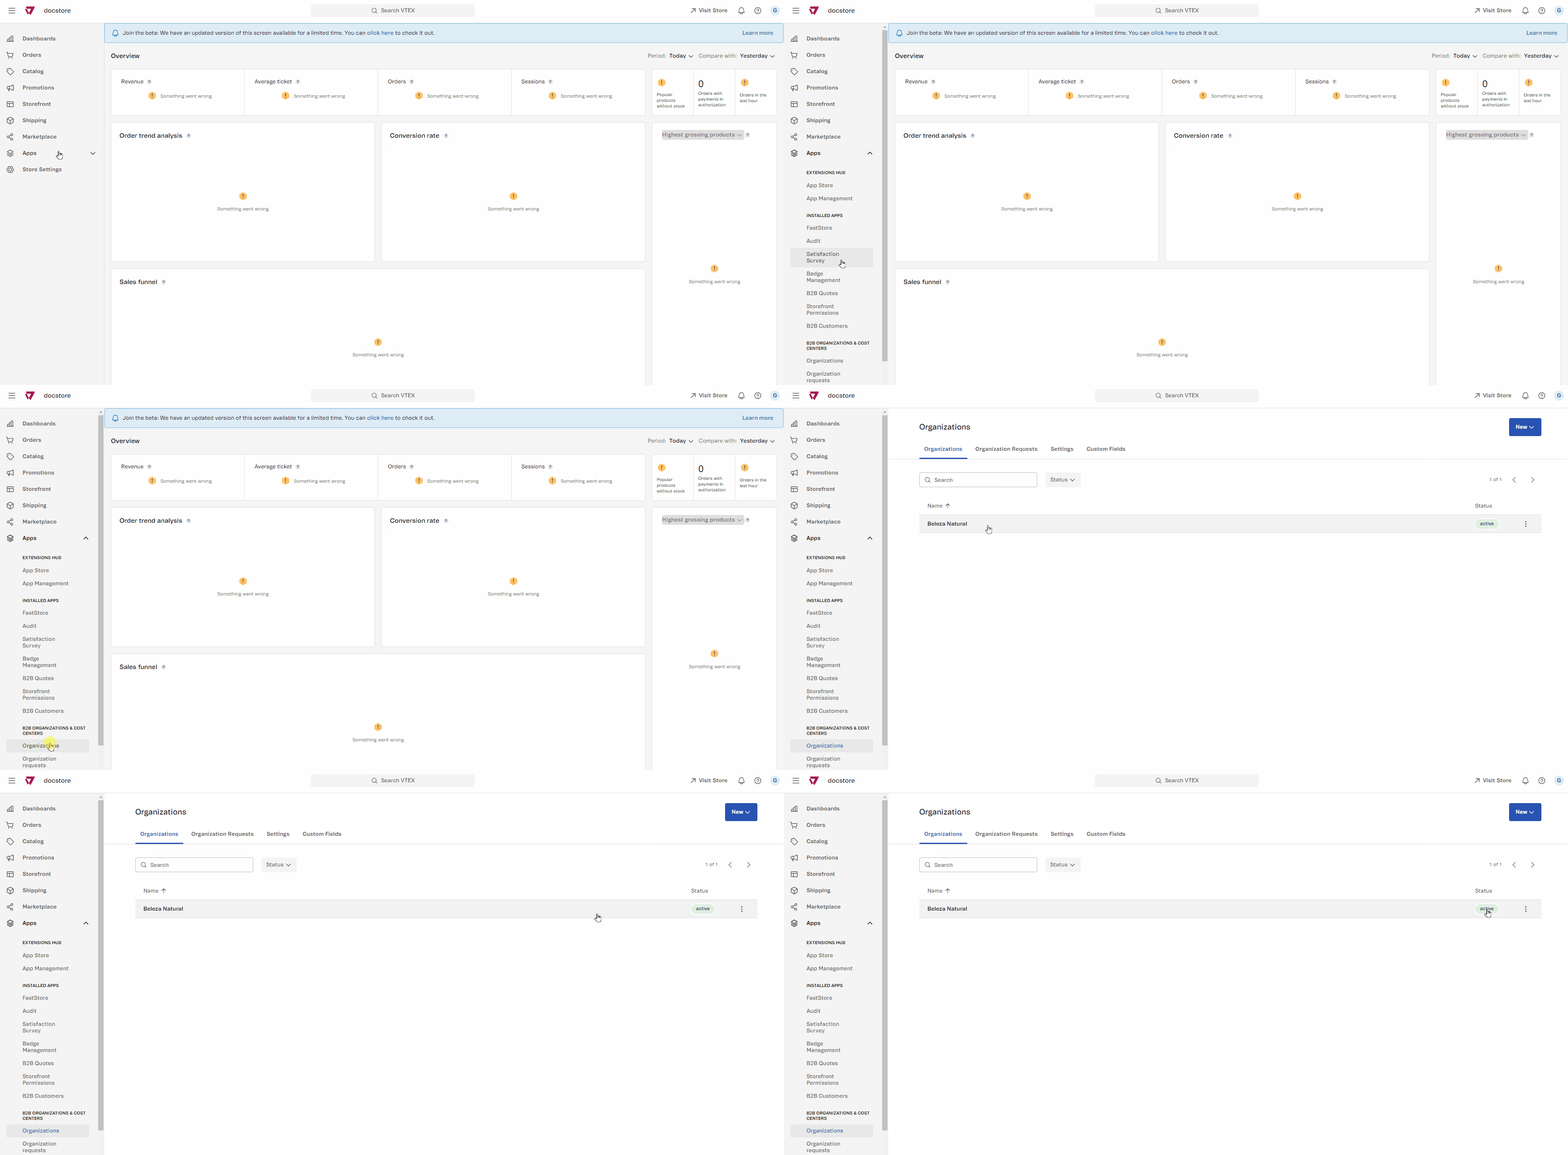
To access a buyer organization in the VTEX Admin, go to Apps > B2B Organizations and Cost Centers > Organizations, or type Organizations in the search bar at the top of the page.
To access an organization, follow these steps:
-
Click the Organizations tab.
-
Click the name of the desired buyer organization.
This section lists all the organizations created in your store, their status, and allow store admins to:
-
Add new organizations.
-
Access the organization details page, which comprises organization data, cost centers, collections, payment terms, price lists, and users.
Organization Status
In the Status column in the Organizations tab, you can see the status of the organization.
You can use the search bar to find organizations by name or filter organizations by status.
Each organization can have one of the following status:
-
Active: The organization has been approved by store admins and is currently active.
-
On hold: The organization is currently paused, which means that its users cannot complete purchases.
-
Inactive: Store admins have deactivated the organization, so your users won't be able to log in.

Adding a new organization
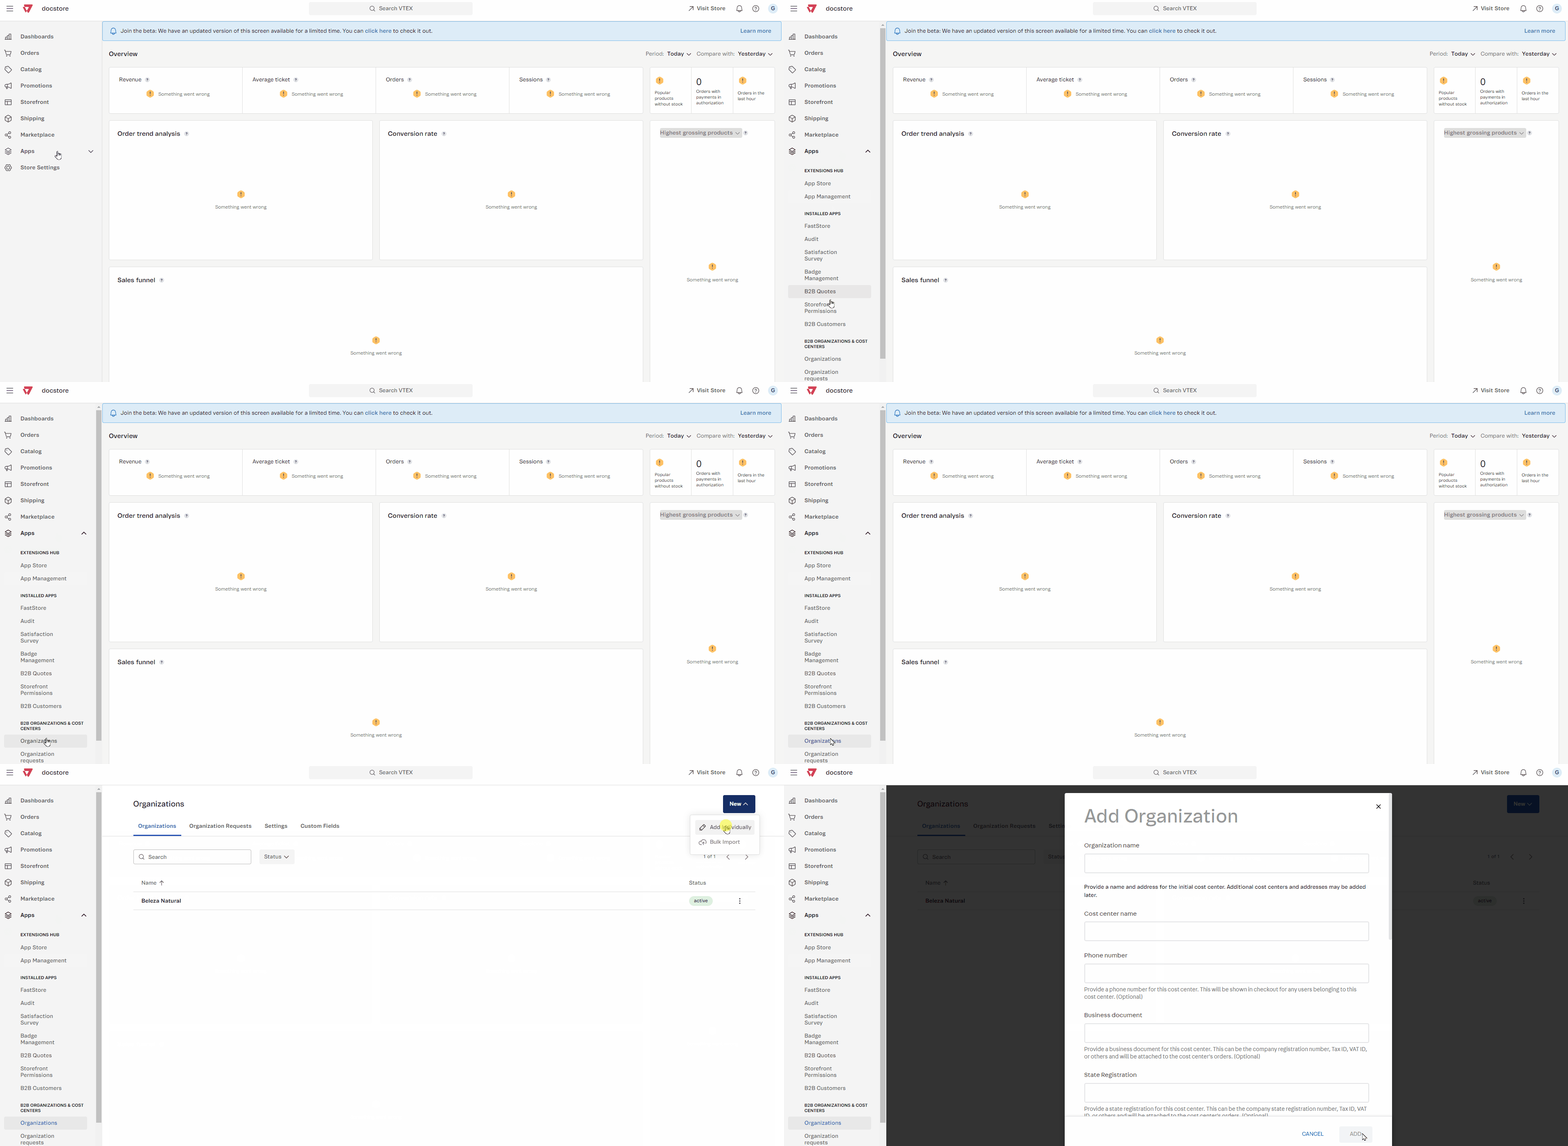
To add a new organization in the VTEX Admin, go to Apps > B2B Organizations and Cost Centers > Organizations, or type Organizations in the search bar at the top of the page.
To add a new organization, follow the steps below:
- Click the Organizations tab.
- Click the
Newbutton, and select the Add Individually option. - Complete the necessary information about the new organization:
- Organization name: Name of the organization you want to create.
- Cost center name: Name of the initial cost center associated with the organization.
- Country: The country where the cost center is located.
- Postal code: Postal code of the cost center address.
- Address: Name of the street where the cost center is located.
- Number: Address number where the cost center is located.
- Additional information: Information that can be added to the cost center's address information.
- Neighborhood: Name of the neighborhood where the cost center is located.
- City: City where the cost center is located. This is completed automatically based on the postal code entered.
- State: State where the cost center is located. This is completed automatically based on the postal code entered.
- Recipient: Name of the person who will receive the orders at the address provided.
- Click the
Addbutton.

Email notifications
The B2B Organizations app provides a set of email templates that are automatically triggered based on specific changes and sent to the organization's users.
| Template name | Recipient | Trigger |
|---|---|---|
| Organization Created | Users with Sales Admin profile | When the organization is created. |
| Organization Approved | Users with Organization Admin profile | When the request to create an organization is approved. |
| Organization Declined | Users with Organization Admin profile | When the request to create an organization is denied. |
| Organization Status Changed | Users with Organization Admin profile | When the organization's status changes. |
To view or customize any of these templates, follow the steps below:
-
In the VTEX Admin, go to Store Settings > Email Templates > Templates.
-
In the search bar, type Organization.
-
Click the template you want to view or edit.
-
Make the desired changes to the template.
-
Click
Save.
To learn more about editing email templates, see How to create and edit transactional email templates.