Warning: there are two ways to configure collections, through the CMS or the Collection module (Beta). This article is about how to configure collections through the CMS.
Window displays are used to highlight products on different pages, or for recommendations on a product page.
First, before defining a window display, you must create a collection (see instructions here) of the products to be displayed. The pages also have to be properly structured, with the required controls included in their templates.
After defining this, link the collection to the window display in Storefront > Layout.
In the example below, we will define a window display on the home page, and to do so the following layout has to be changed:
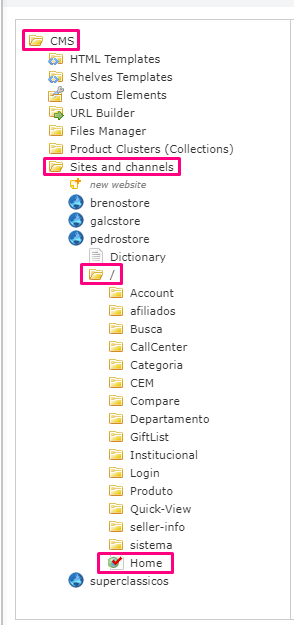
In the selected layout, add the control for the window display where you want to display the collection by clicking on Add Object After selecting the type of control you want, set its name and click Adicionar (Add)
Do not forget to click on the "Save Settings" button so that you can later edit the created control.

Editing created control
To edit your controls, click on the pencil symbol, as shown in the example image below:

When you editing the control you must add its contents by clicking Add content, which represent each set of items to be displayed.
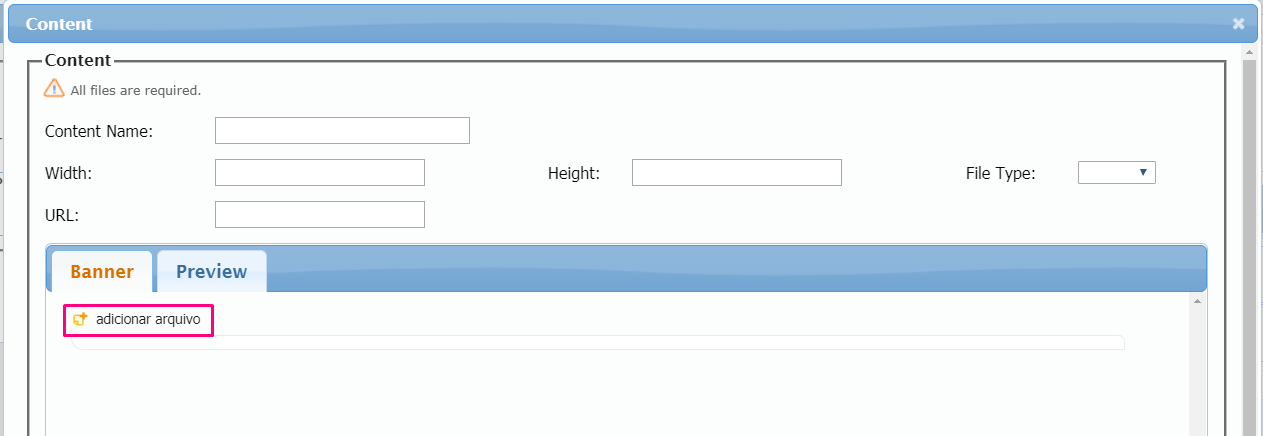
- "Adicionar arquivo" (add file): to select the collection that will be displayed in this content.
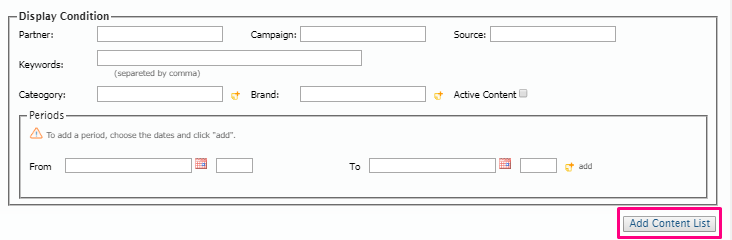
- Partner / Campaign / Source: defines the display of this content if the visitor has a corresponding UTM in its source URL.
- Keywords: links the content display to a search for specific term(s).
- Category / Brand: links the display of content on a specific Category / Brand page.
- From / To: defines the period in which the content will be active.
Check Active Content box and click on Add content list. Do not forget to save all changes clicking on Save Settings later.
Attention! Whenever you use more than one active content in the same control, you must sort them (by clicking and dragging your content) so that content without display conditions always stays in the last position.
Editing created content
If it is necessary to update the created content after saving it, just click on the second pencil symbol as shown below:
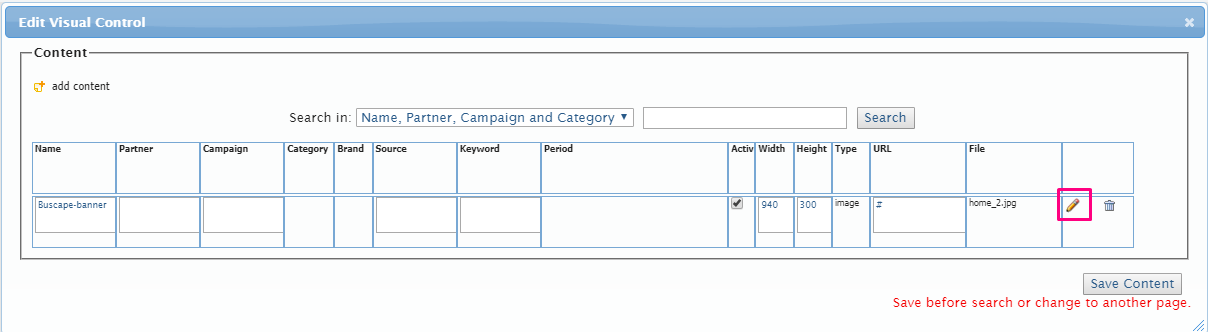
Click Update Content List after all changes were made and clicking on Save Settings afterwards.
__Attention! __ When creating or editing items in CMS, it is indispensable to click on Save Settings so that no changes are lost.