A role determines the set of resources that a group of users can access on VTEX. You can manage roles via the VTEX Admin, where you can define the resources and users associated with each role.
When creating a role, you can either use a predefined role created by the VTEX team to meet common operational scenarios or create a custom role, selecting specific resources that users with this role need access to.
Check the steps for each of these options below:
We recommend creating roles that are analogous to the store's hierarchical structures. This approach ensures that all employees are accountable for the information they have access to. Best practices for managing roles not only increase operational security but also heighten the awareness of those handling sensitive store data and customer information.
Unrestricted use of overly permissive roles increases the risk of store attacks through leaked login credentials.
Using predefined roles
To start using a predefined role, follow the instructions below:
-
In the top bar of the VTEX Admin, click your profile avatar — indicated by the first letter of your email — and then click Account settings > User roles.
You will see a list of all the roles added to the account. For more information on this page, read the Roles article.
-
Click
+ Create Role. -
Click the
Choose rolefield and select one of the predefined roles displayed in the dropdown menu. Do not choose the Custom option, as it is dedicated to custom roles.You will see which resources are included in this role, sorted by product.
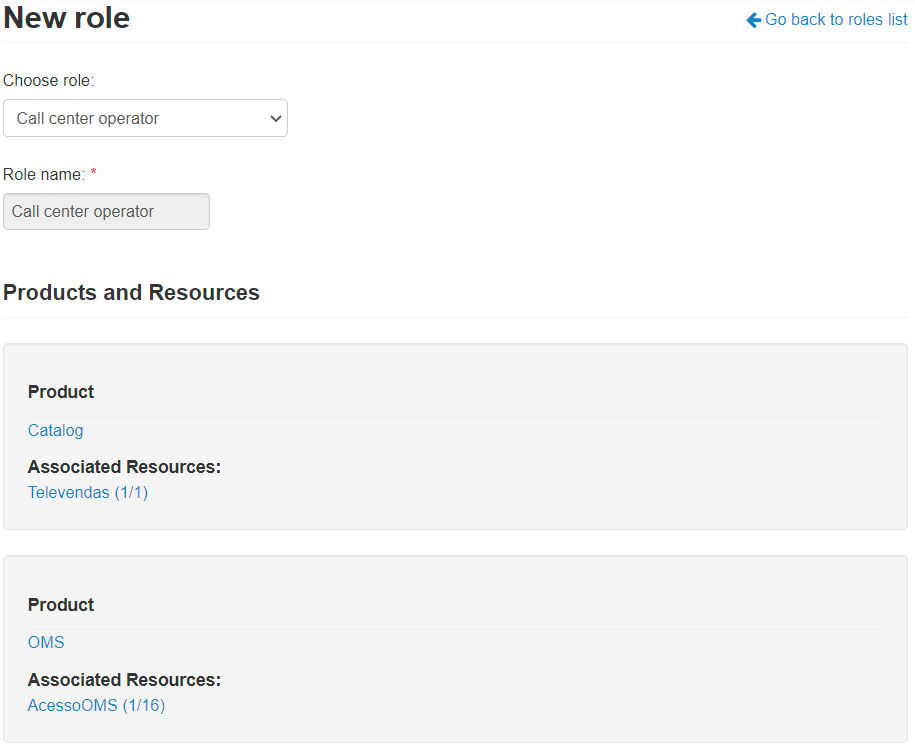
For example, the Call center operator profile has a Catalog product resource that allows operations to be carried out in a store on behalf of a customer and an OMS resource that allows verifying an order status:
Learn more about the available predefined roles and their associated resources in Predefined roles.
-
Add admin users to the role by entering the user email address in Add users to this role and click
Add.
If the user does not exist, a new user will be created using the email as the name, i.e., the name and email will be the same.
-
Click
Save.
Creating custom roles
To create or edit a role, the user must have a User Administrator - RESTRICTED role and also a role that includes the specific product or resource they want to edit. Having only the User Administrator - RESTRICTED role is not sufficient. For example, to edit a role that contains resources from the OMS product, the user must be assigned both a User Administrator - RESTRICTED role and a role that includes OMS resources. This rule applies to both the editing of existing roles and the creation of new custom roles. The user must have access to the corresponding product in order to add or modify its resources.
To create a custom role that meets the access needs of a group of users, follow the instructions below:
-
In the top bar of the VTEX Admin, click your profile avatar — indicated by the first letter of your email — and then click Account settings > User roles.
You will see a list of all the roles added to the account. For more information on this page, read the Roles article.
-
Click
+ Create Role. -
To create a custom role, click the
Choose rolefield and select the Custom option from the dropdown menu. -
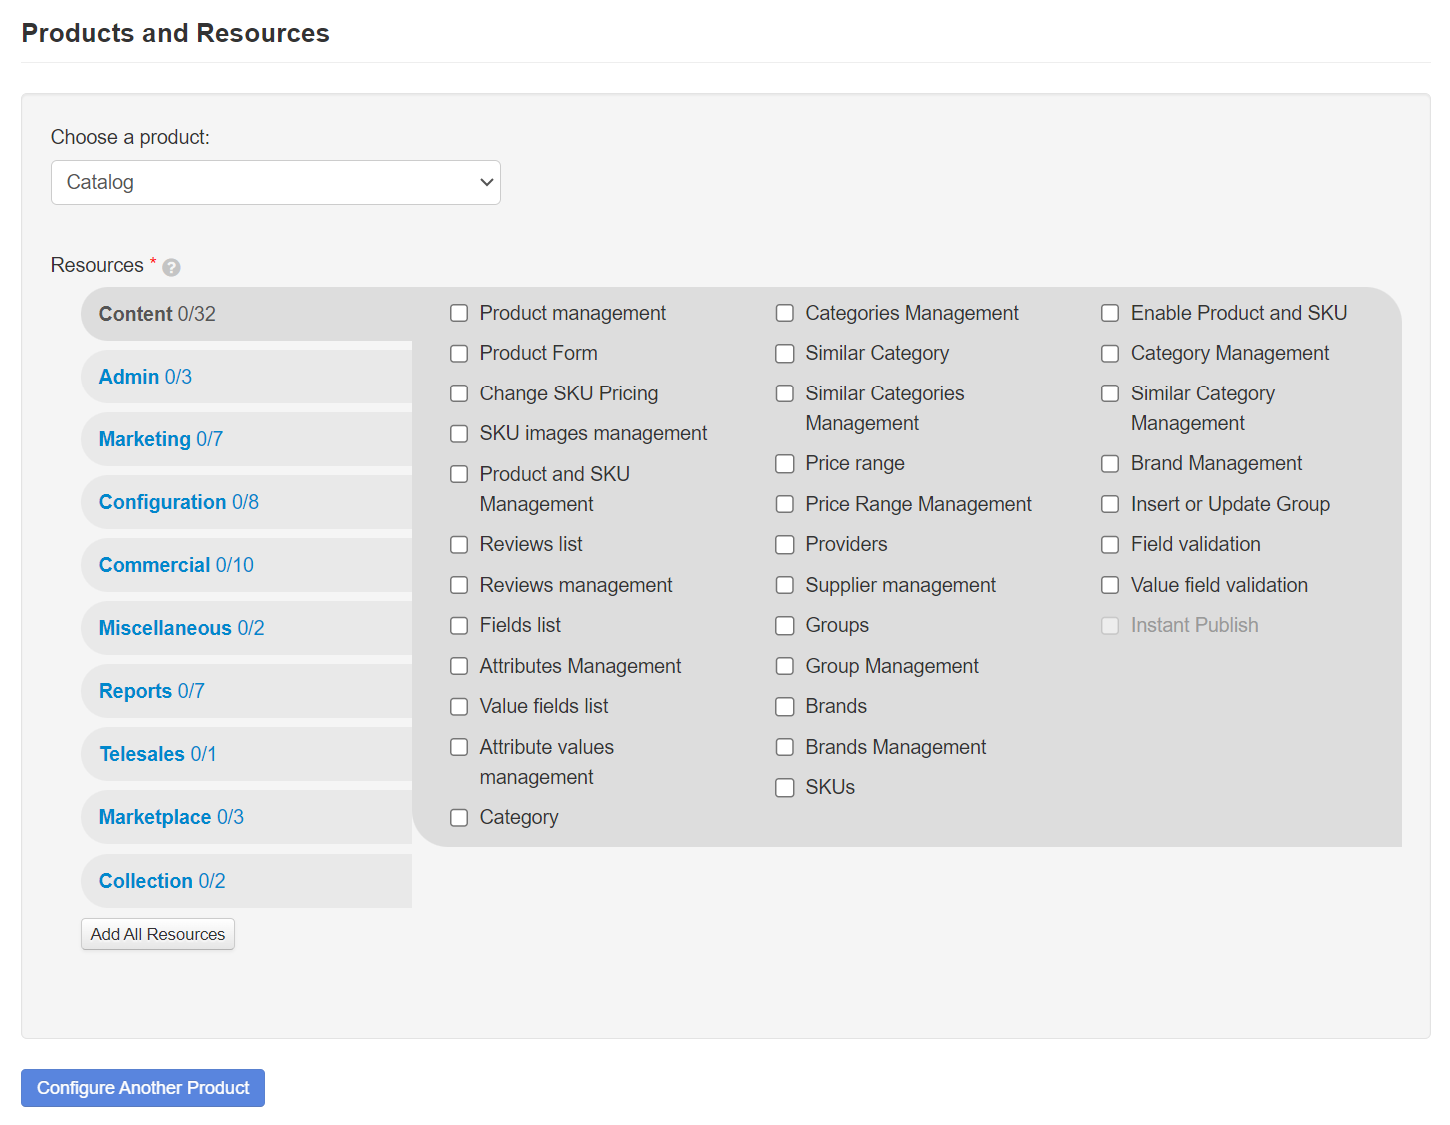
Click the dropdown menu under Choose a product and select a product from the list.
You will see a list of all the resources available for the product:
-
Check the resources to which the role should grant access. Check the complete License Manager resources list for more information on each one.
-
If you want to add resources from another product, click the Configure Another Product button at the bottom of the product and resource list and repeat steps 4 and 5.
You can add resources from as many products as you need to the role.
-
Type a name for the custom role in the Role name field.
Choose descriptive names for the roles, clearly indicating the type of user who should have access. We recommend indicating the position in the company or the activity to be carried out on the platform.
-
Add admin users to the role by entering the user email address in Add users to this role and then click
Add.
If the user does not exist, a new user will be created using the email as the name, i.e., the name and email will be the same.
-
Click
Save.Once created, the new role will be listed on the Roles page.